...
- Using ACE, open the default config you used in the "Getting Started Guide"
Download the Elecsys-ModbusTCP-Demo.xml from the http://partner.elecsyscorp.com site, and open the downloaded .xml file within the same ACE window as your "Getting Started Guide" configuration
You will need to extract the .xml file from the .zip file you downloaded from the website. By default, ACE stores configuration files in the Documents\Elecsys\ACE\CFG folder, but you can store the configuration in any file location accessible by the ACE program.
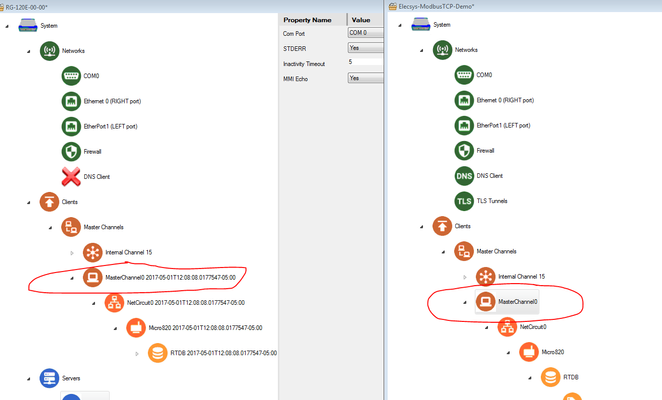
You cannot copy/paste nodes unless both configurations are open within the same instance of ACE. You can use the "Tile" buttons to have the windows automatically size themselves within the ACE program:
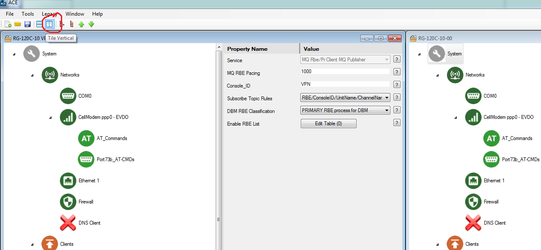
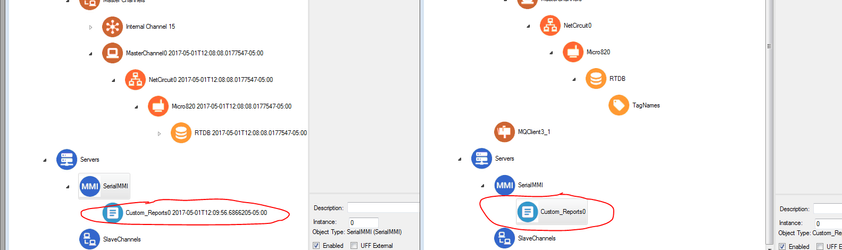
Copy and paste the following objects from the Elecsys-Modbus-Demo config into the configuration you created in the "Getting Started" guide:
- Master Channel0
- Custom_Reports0
Include Page Renaming Nodes Renaming Nodes - Master Channel0
Edit one of the Ethernet ports so that it is on the same network as your Modbus device
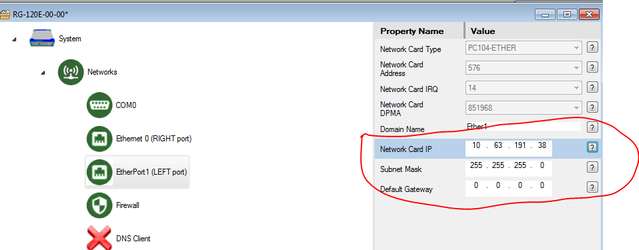
Info title Ethernet Configuration Setting the Network Card IP, Subnet Mask, and Default Gateway values to "0.0.0.0" will cause the Ethernet port to obtain an address via DHCP
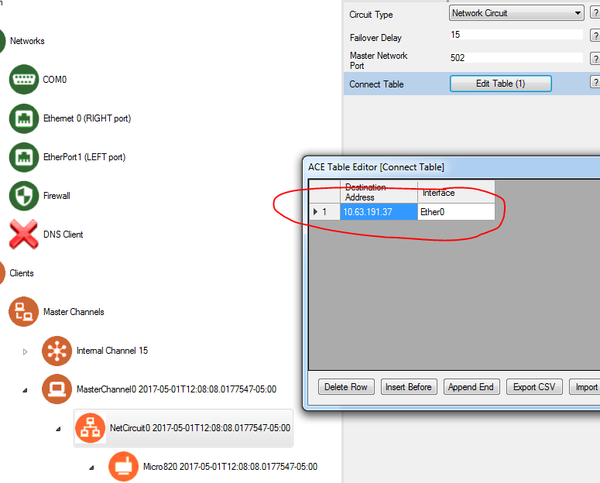
Edit the "NetCircuit0" object to match the settings on your Modbus device
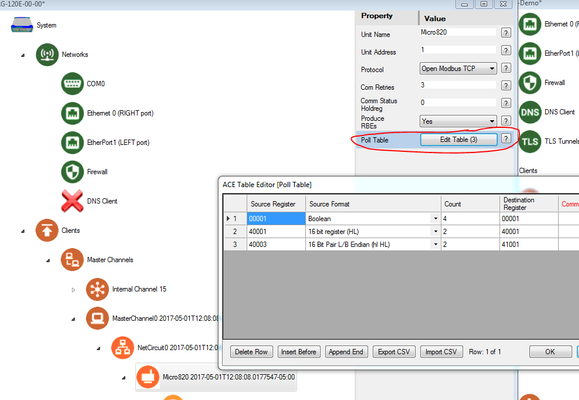
Edit the "Micro820" object to poll the appropriate registers for your Modbus device.
- Edit your RtdbMod object so that it contains the correct number of database holding registers for the Modbus polls

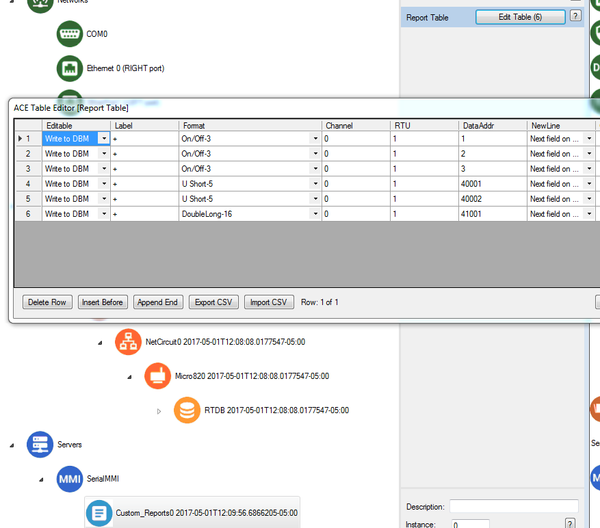
- Edit your Custom_Reports0 object so that it shows some of the Modbus tags you will be polling
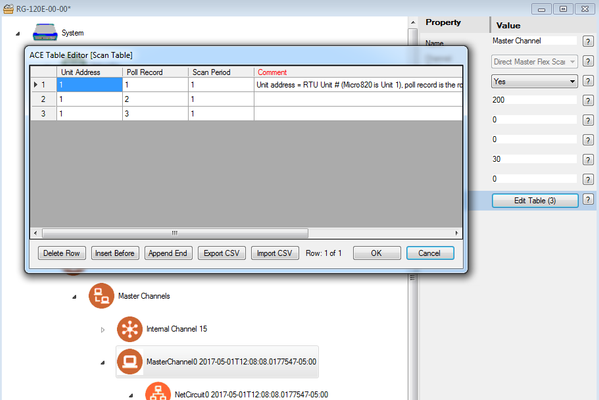
- Edit your MasterChannel0 → Scan Table to set the scan rate for the polls configured in the poll table. For more information on how scan tables are configured, see Scan Table Configuration.
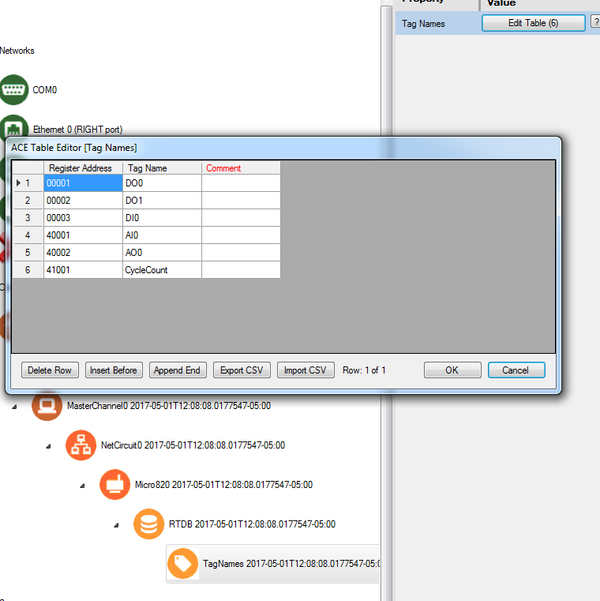
- OPTIONAL: Edit the TagNames object so that the RTDB registers are labeled with the correct tag names
- Save and upload the configuration to the RediGate
- Using Putty, SSH into the device and view the Custom Reports
- User menu option 3 Diagnostic Services, 535 View Custom Report, Refresh rate of 5 seconds
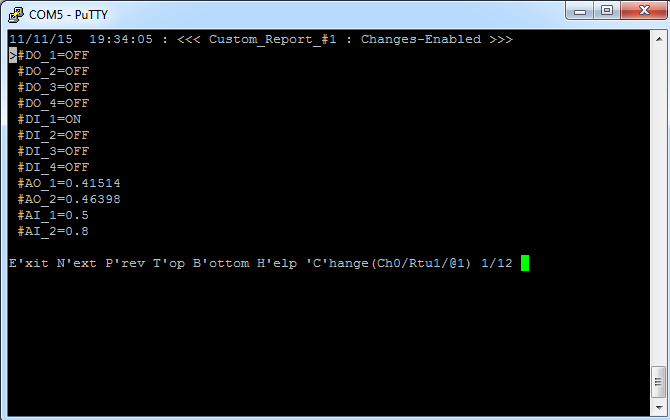
- User menu option 3 Diagnostic Services, 535 View Custom Report, Refresh rate of 5 seconds
...