EtherNet-IP to RediGate Master
Introduction
In this tutorial, we will be demonstrating connectivity from a RediGate 120C to an Allen-Bradley 1769-L16ER-B1B CompactLogix processor over EtherNet/IP. This tutorial can be used to for connecting and RediGate with a device-level Ethernet port to any EthnerNet/IP enabled Allen-Bradley PLC (CompactLogix or ControlLogix). For MicroLogix, SLC, or PLC-5, see the DF1 Over Ethernet to RediGate Master guide.
See Protocol_EtherNetIP-Master for a discussion of the supported (and currently unsupported) features and data types of the Ethernet/IP driver. Contact Elecsys for assistance.
Pre-Requisites
- A RediGate 120X or 400 series device with an open Ethernet port
- Completion of the Getting Started Guide for your respective RediGate device (RediGate 100 or RediGate 400)
- An Ethernet connection to an EtherNet/IP enabled PLC. You will need to configure your RediGate's local Ethernet port to be on the same network as the PLC, and you should confirm that you are able to ping the PLC through that port.
Instructions
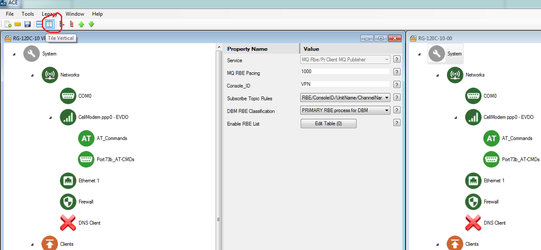
- Using ACE, open the default config you used in the "Getting Started Guide"
Download and open the Elecsys-EtherNetIP-Demo.xml from the http://redigate.elecsyscorp.com/examples site within the same ACE window as the configuration you used in your "Getting Started Guide".
- You will need to extract the .xml file from the .zip file you downloaded from the website. By default, ACE stores configuration files in the Documents\ACE\CFG folder, but you can store the configuration in any file location accessible by the ACE program.
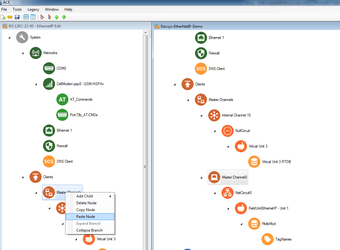
- You cannot copy/paste nodes unless both configurations are open within the same instance of ACE. You can use the "Tile" buttons to have the windows automatically size themselves within the ACE program:
- Copy the "Master Channel0" channel from the Elecsys-EtherNetIP-Demo.xml and paste the node into your configuration:
- Edit the "NetCircuit0" → Connect Table to have the IP address of the PLC you will be connecting to. Do not worry about the "Interface" column; it is only used for legacy protocols, not Ethernet/IP:

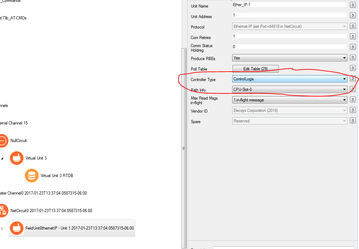
- Under the "FieldUnitEthernetIP - Unit 1" object, edit the controller type and controller path to match that of your PLC:
- Use the ACE Configuration Management Utility to select tags from your PLC and set up the tables for the Master Channel (Scan Table), EthernetIP (Poll Table), RtdbMod table, and TagNames table.
Below are brief instructions describing the use of the ACE Configuration Management Utility for setting up RediGate configurations to poll EtherNet/IP devices. The ACM Utility includes an L5X Import feature, which is described in more detail here: Elecsys ACE Management Utility
- Download, extract, and install the "ACE Configuration Management Utility" software from http://redigate.elecsyscorp.com/software
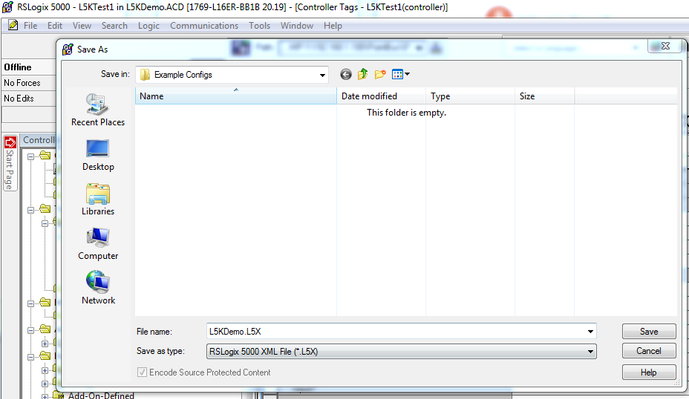
- From the Rockwell software, save the .ACD or .L5K file of the controller you are working on as a .L5X file:
- Set up an ACE configuration file with Master Channel, NetCircuit, FieldUnitEthernetIP, RTDB, and TagNames object. The tables in these objects (excluding NetCircuit) will be configured using the ACM Utility. All other properties will need to be configured in the ACE Editor.
- In the ACM Utility, click the Main Menu button. Choose a location with your ACE XML configuration(s) and set the output path, then click List Configurations.
- Click the L5X Import button to set the following properties:
ACE XML Configuration - choose the configuration file to modify.Choose the Master Channel and EtherNet/IP Field Unit to configure.Choose the L5X program file.Unless you are reconfiguring an existing configuration, clear the L5X Tag Setup File to set up a default filename.Then click the OK button to read tags from the L5X PLC program.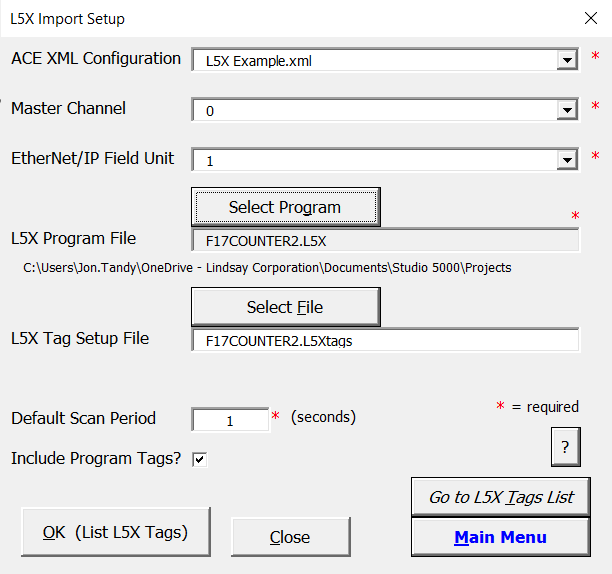
- On the L5X Tags sheet, select which tags you would like to have the RediGate poll by entering a "1" in Column A (Include) next to each tag or array or AOI/UDT structure. Clear the "1" for any tags you don't want to poll.
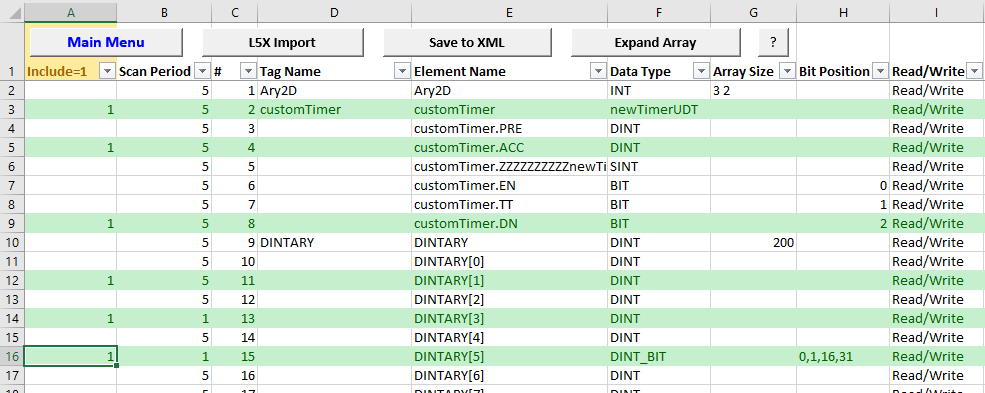
- Click the “Save to XML” button to save the tag information into the ACE XML configuration. Switch back to the ACE Editor and re-open the modified configuration to continue editing or to upload it to the RediGate.
- Once the tags have been imported, upload the configuration to the device (File → Upload XML to Device)

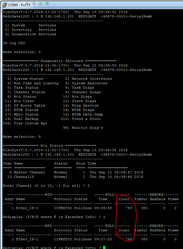
- Create a Putty session into the RediGate to confirm that the RediGate is successfully polling the tags. You may get some errors on start-up, but if you see the Poll Count field incrementing, your RediGate is configured correctly.
Congratulations, you have successfully configured your RediGate to talk to an EtherNet/IP device. If you are interested in publishing your data to a cloud IoT platform, download one of our "IIoT Platform Quick Starts" from http://redigate.elecsyscorp.com/examples/.