Introduction
...
- Using ACE, Open the default configuration you used in the "Getting Started Guide".
- Download and open Elecsys-AWS-Demo.xml from the http://partnerredigate.elecsyscorp.com/examples/ site (AWS IoT Platform example) within the same ACE window.
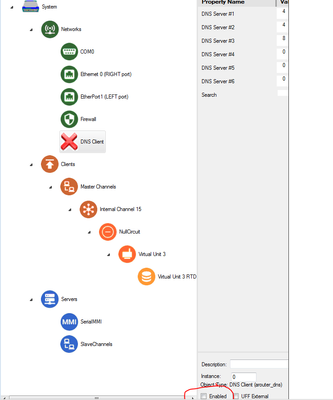
- In your default configuration, enable the DNS Client object by setting its Enabled checkbox.
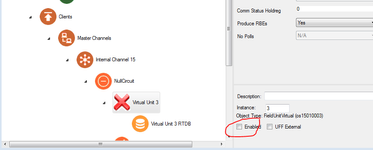
- Disable Virtual Unit 3 by clearing its Enabled checkbox.
- Copy and paste the following objects from the Elecsys-AWS-Demo.xml config into your default configuration:
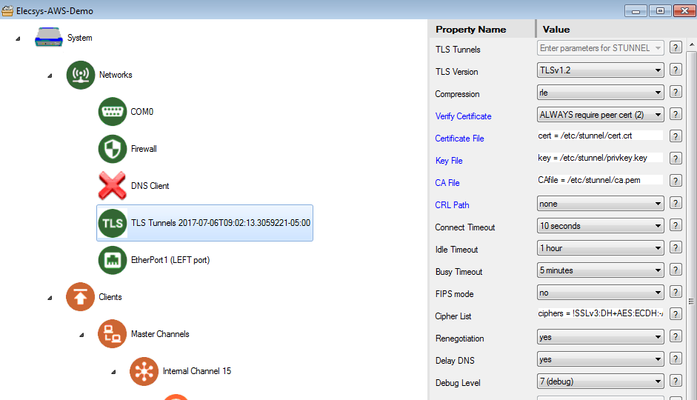
- TLS Tunnels (paste under Networks)
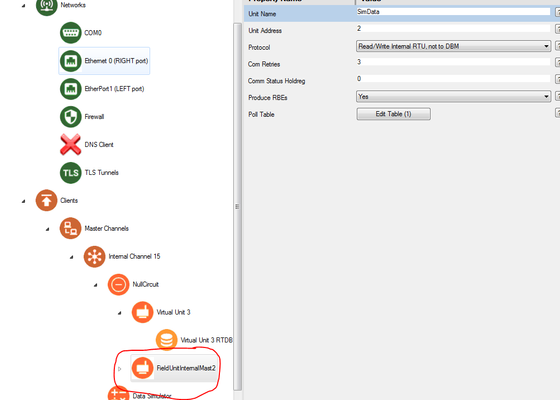
- FieldUnitInternalMast2 (paste under NullCircuit)
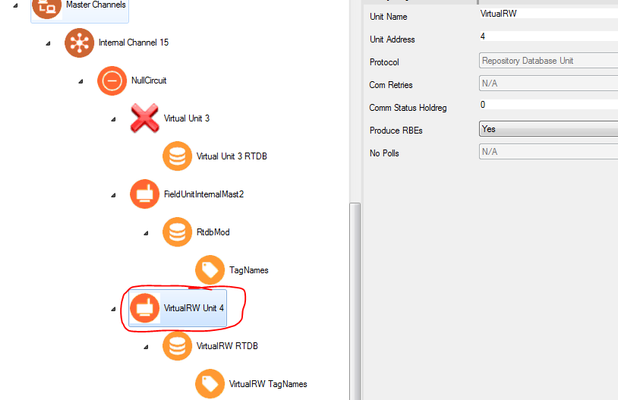
- VirtualRW Unit 4 (paste under NullCircuit)
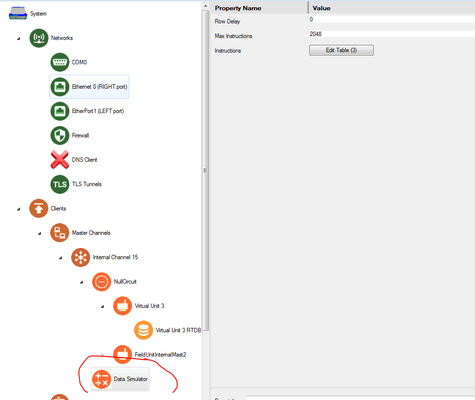
- Data Simulator (paste under Internal Channel 15)
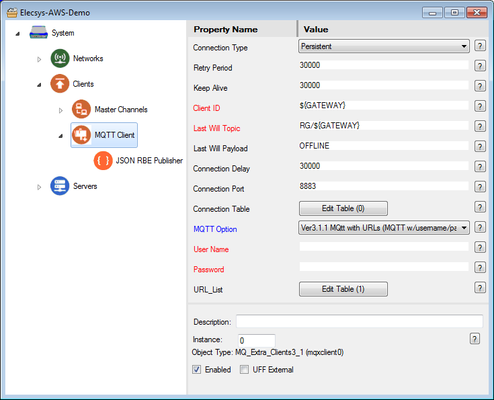
MQTT Client (paste under Clients)
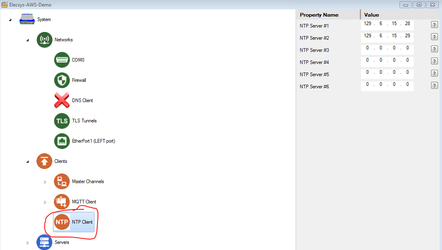
NTP Client (paste under Clients). This insures that your RediGate has the correct system time, which is important for the TLS certificates.
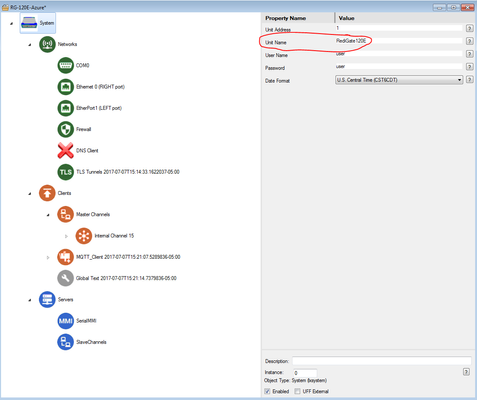
The ${GATEWAY} parameter in your MQTT Client's "Last Will Topic" references the System → Unit Name value. For this example, change the Unit Name to "RG-AWS".
Include Page Renaming Nodes Renaming Nodes
- TLS Tunnels (paste under Networks)
Copy Table data from the Elecsys-AWS-Demo.xml Internal Channel 15 → Scan Table into your RediGate Configuration (in Internal Channel 15, open Scan Table, right-click and select Paste, over-write data).
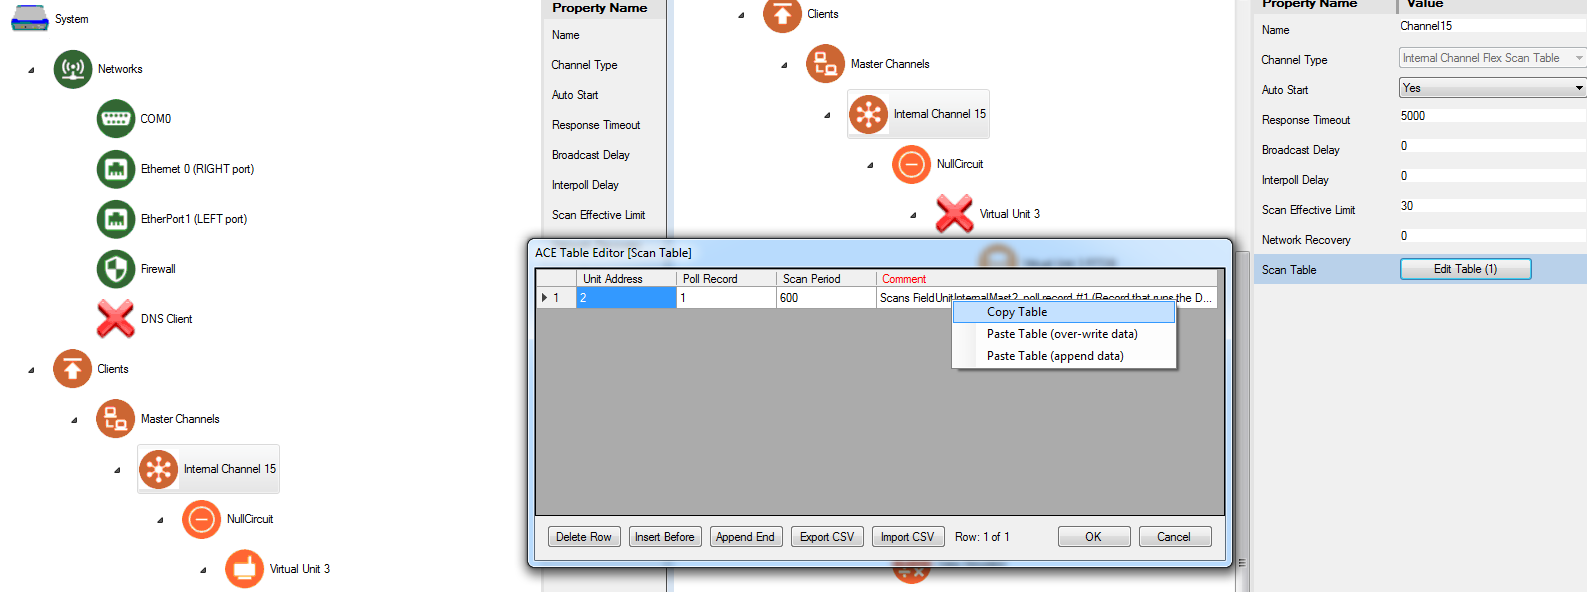
Info title Scan Table Info The "Scan Table" object tells the RediGate which RTU (Unit 2, the data simulator) to run at an interval (Scan Period) which is set to every 600 seconds. This is how frequently the RediGate will check the data simulator for changes, which will result in data being published every 10 minutes. You can change this to whatever number you would like, however you will want to keep an eye on the number of messages published as most IoT platforms charge on a per message or KB basis. Edit your TLS Tunnels → STUNNEL Parameters object so that the "Connect To" field matches the end point in your AWS IoT system.
(In AWS IoT Platform, see "Settings" for the "Custom endpoint" name.)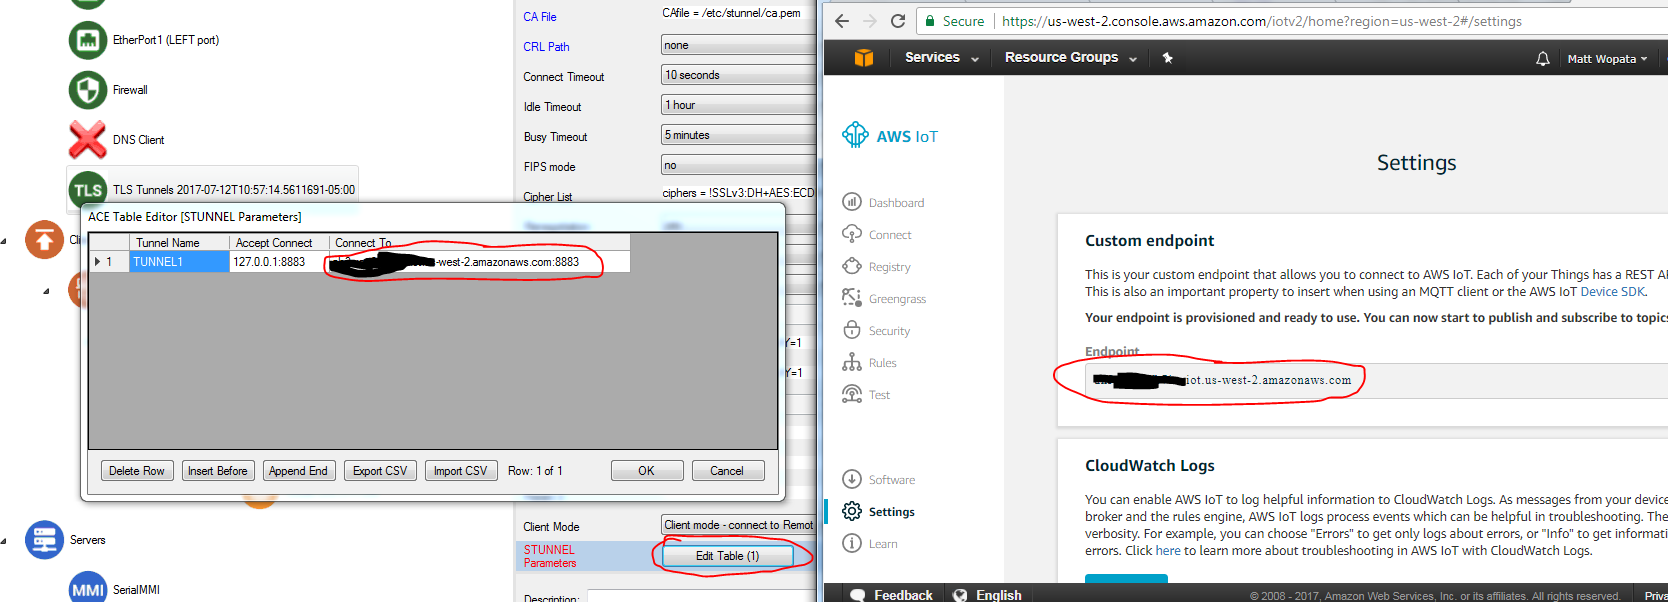
- Create a device (or "Thing") for the RediGate in AWS, and move the Certificate, Private Key, and CA files from the "Thing" to your RediGate configuration:
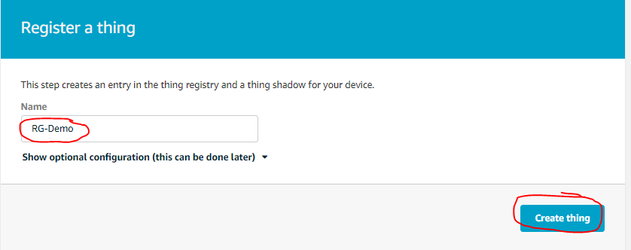
- Create a new "Thing" in AWS IoT Registry:
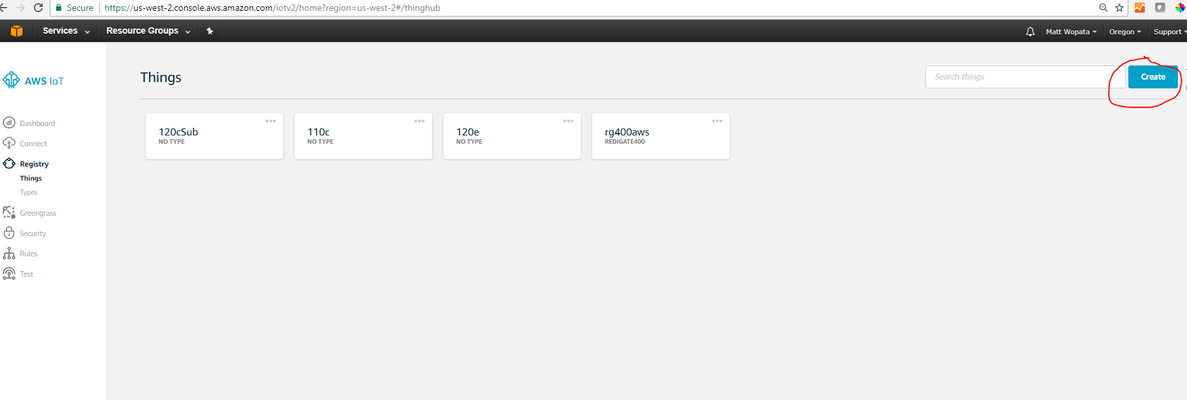
- Give your thing a name, and select "Create Thing"
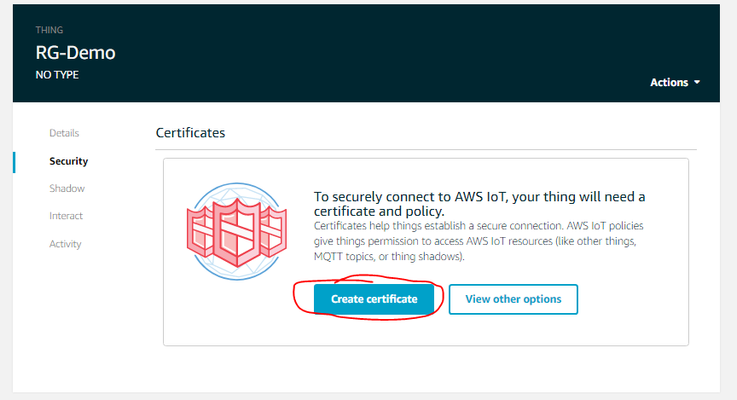
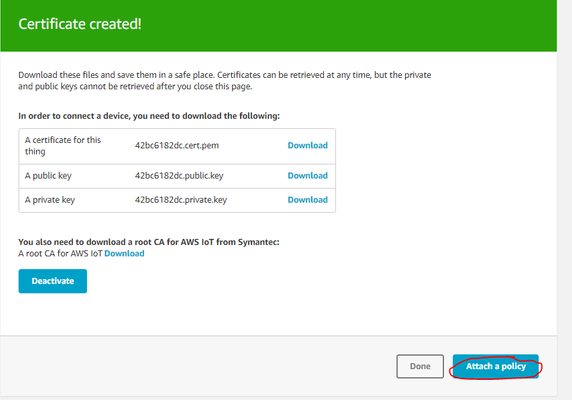
- Select Security → Create Certificate
Download all of the keys and the root CA to your computer.
Info title Names of key files Note: You will need to rename the certificate, private key, and root CA to match the name of the files specified in the TLS Tunnels object ( cert.crt, privkey.key, ca.pemin the screenshot below). By default, Windows does not allow users to view/edit file name extensions, so you may have to change that setting under Control Panel → Folder Options: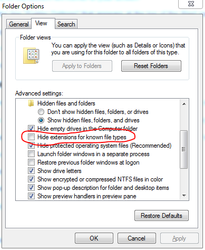
Click the "Activate" button to activate the certificate.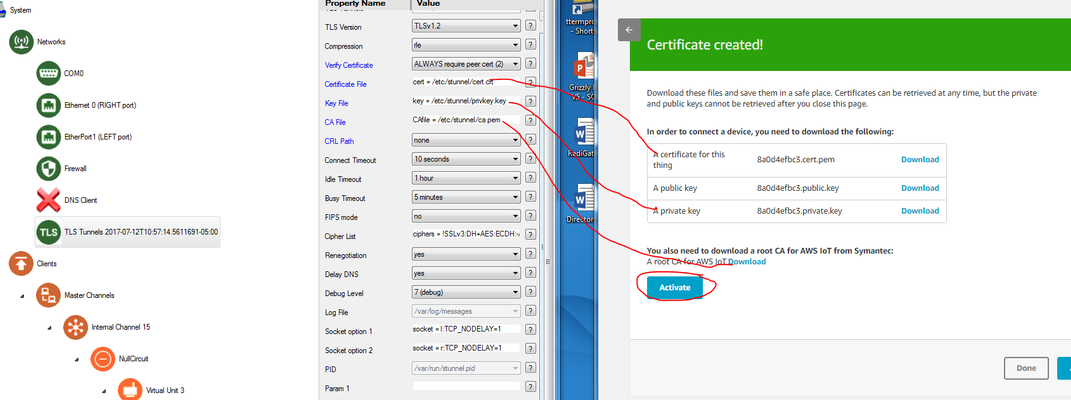
- Click on "Attach a policy" and create or attach an authorization policy to this device certificate:
- The screenshot below shows a policy that allows the RediGate to publish, subscribe, and connect to any topic:

Here is the text of the example policy code to include in the policy. Click on "Advanced mode" and copy the following into the Policy statement section (replace existing contents):
{ "Version": "2012-10-17", "Statement": [ { "Effect": "Allow", "Action": [ "iot:Publish", "iot:Connect", "iot:Subscribe", "iot:Receive" ], "Resource": [ "*" ] } ] } - Confirm that your Thing's certificate has the correct policy attached to it:

- Save and upload your configuration, certification, private key, and CA to the RediGate:
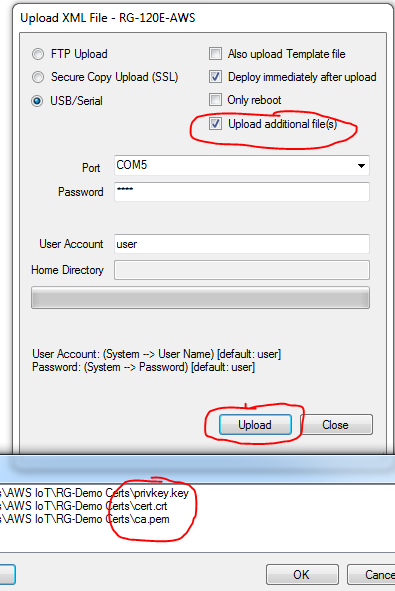
- Connect to the RediGate as "root" using Putty (email us at idc-support@elecsyscorp.com for the default root password), and move the TLS files from the upload directory to /etc/stunnel. Use the commands:
cd /home/directormv cert.crt /etc/stunnelmv ca.pem /etc/stunnelmv privkey.key /etc/stunnel
NOTE: If the files you uploaded are not located in the/home/directorfolder, check the/home/Dirupldfolder.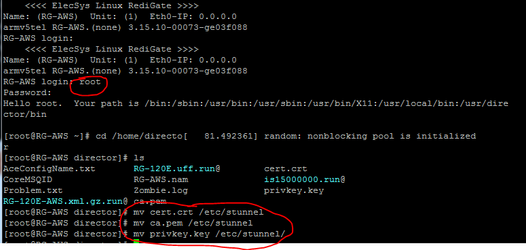
- Finally, reboot the RediGate with the command:
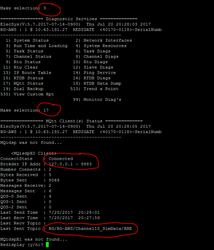
reboot - After the RediGate reboot, log in as "user" and verify that it has connected to the AWS IoT broker using the menu option 3 → 17.
...
The value that you published should be saved in the Internal Channel 15 → Virtual RTU 4 → RTDB → Register 30001. See Accessing RTDB Data Dump for info on viewing RTDB values in the RediGate
| Tip | ||
|---|---|---|
| ||
Congratulations! You can successfully publish data to and subscribe to data from the AWS IoT service with your RediGate. You are now ready to start connecting real field devices to AWS IoT. Check out our "Field Device Quick Starts" found at http://partnerredigate.elecsyscorp.com/examples/ for examples showing how to connect the RediGate to 60+ industrial protocols. |
...