...
- Set up a second RediGate demo to AWS using this tutorial: RediGate to AWS IoT.
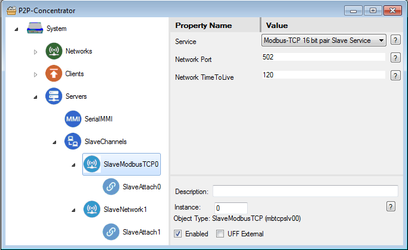
For the System → Unit Name, use "P2P-Concentrator".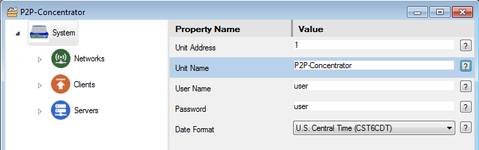
- Save the configuration as P2P-Concentrator.xml.
- Make sure the MQTT Client → Client ID is: ${GATEWAY}
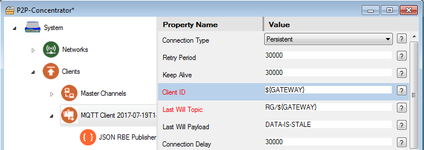
- In the JSON RBE Publisher object, edit the Topic Rules table.
Set up the topic rules as follows:
Device Publish (change RBE to CMD):RG/${GATEWAY}/${CHAN}_${DEV}/CMD(Comment: Publish commands to the field RediGate.)
Device Subscription (change CMD to RBE, and ${GATEWAY} to +):RG/+/${CHAN}_${DEV}/RBE(Comment: Subscribe to the publish topic of the field RediGate.)
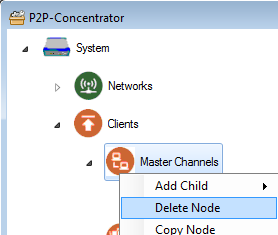
- Right-click on Master Channels and select Delete Node to delete the Master Channels object from the original AWS demo.
- Download Elecsys-P2P-Demo-Concentrator.xml from the the http://partnerredigate.elecsyscorp.com site (Peer-to-Peer example) and open it within the same ACE window.
- Copy and paste the following objects from the Elecsys-P2P-Demo-Concentrator.xml config into your P2P-Concentrator.xml configuration:
- Master Channels (paste under Clients)
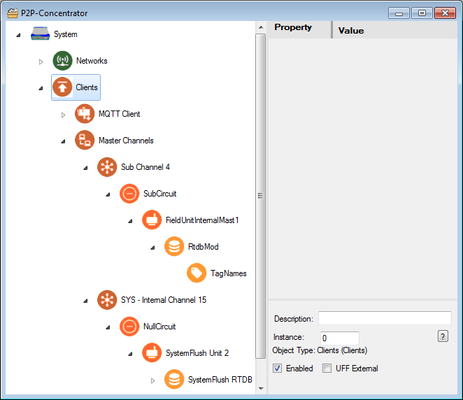
- SlaveModbus TCP0 and SlaveNetwork1 (paste under Slave Channels).
- Master Channels (paste under Clients)
- Under Networks, select Firewall, then click the Edit Table button for Port Management.
Click the Append End button twice, and modify the last two rows to have Dest Port 502 and 3040.
(Should also have INPUT Chain, tcp packets, and ACCEPT Packet.)
Interface name should be the same as your AWS configuration, eth0 or eth1 for Ethernet or ppp0 for cellular.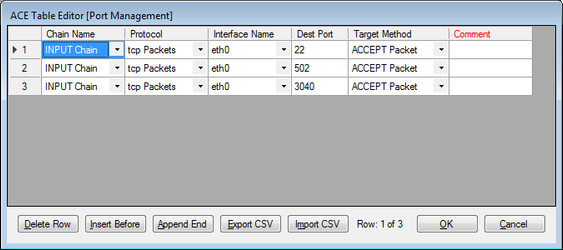
This Firewall setting is necessary to allow the Modbus host to have access for polling the RediGate over a network interface. - Save changes to the P2P-Concentrator configuration and upload it to the second RediGate.
...