...
- Using ACE, Open the default configuration you used in the "Getting Started Guide"
- Download and open Elecsys-AzureIoT-Demo.xml from the http://partner.elecsyscorp.com site within the same ACE window
- In your default configuration, enable the DNS Client object by setting its Enabled checkbox.
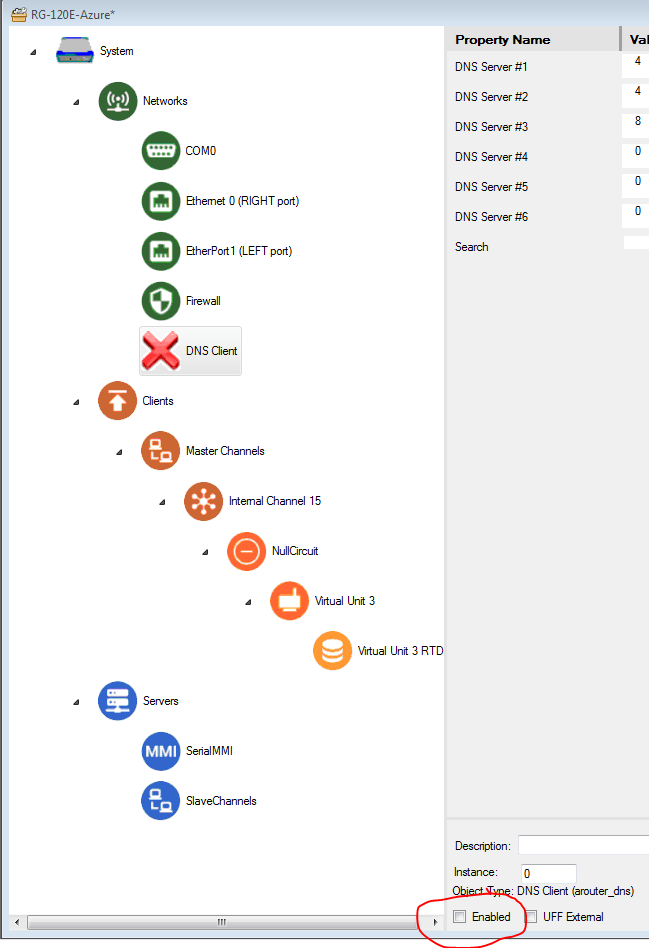
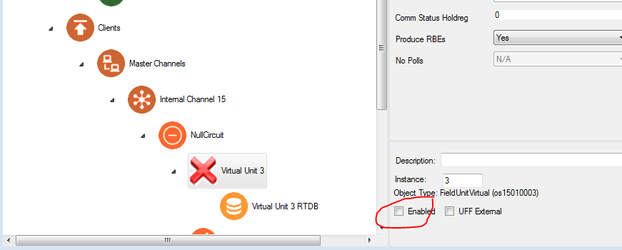
- Disable Virtual Unit 3 by clearing its Enabled checkbox.
- Copy and paste the following objects from the Elecsys-AzureIoT-Demo.xml config into your default configuration.
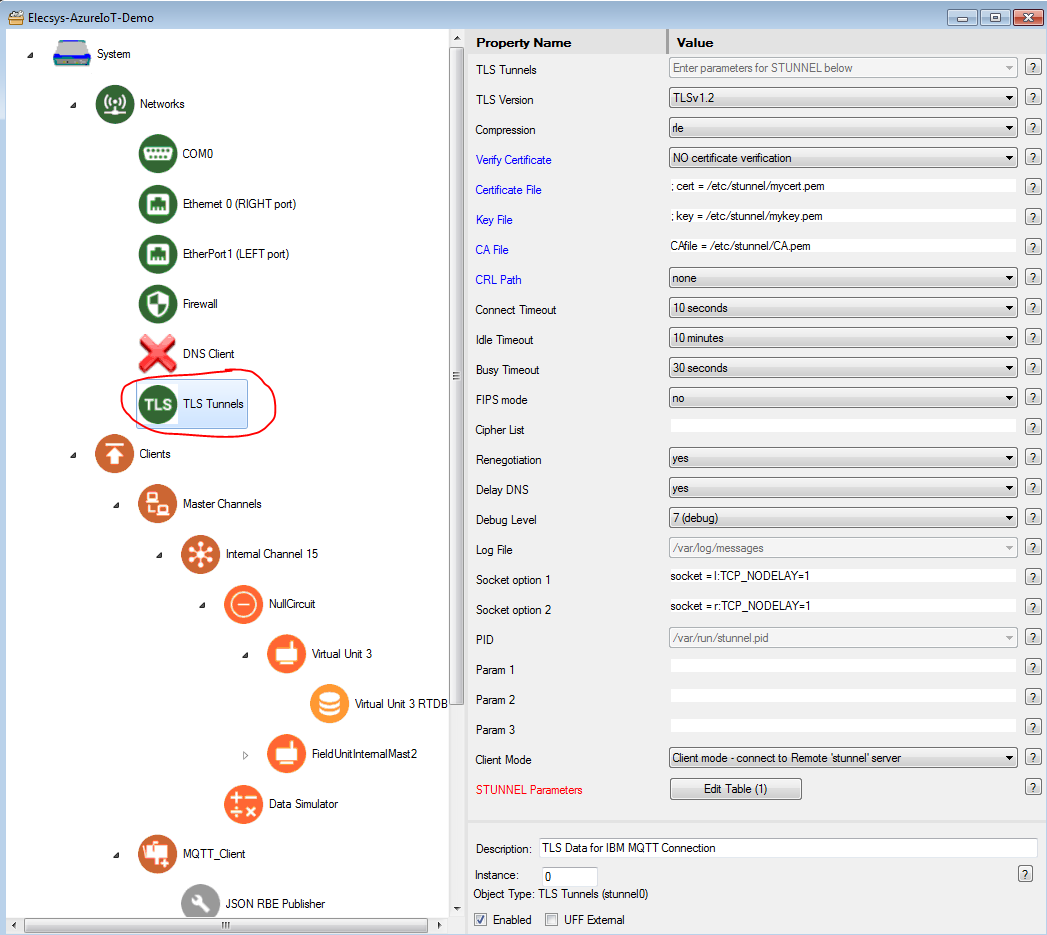
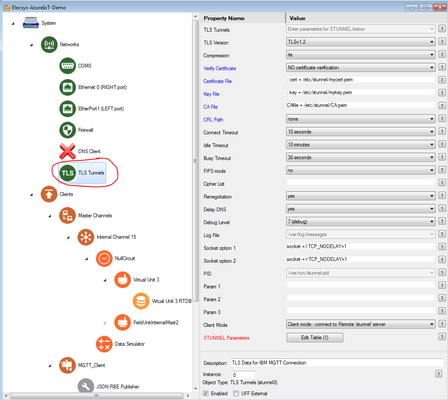
- TLS Tunnels (paste under Networks)
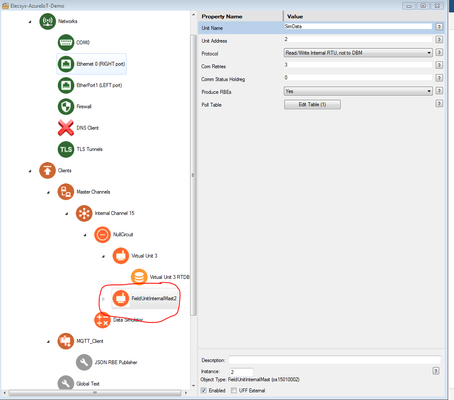
- FieldUnitInternalMast2 (paste under NullCircuit)

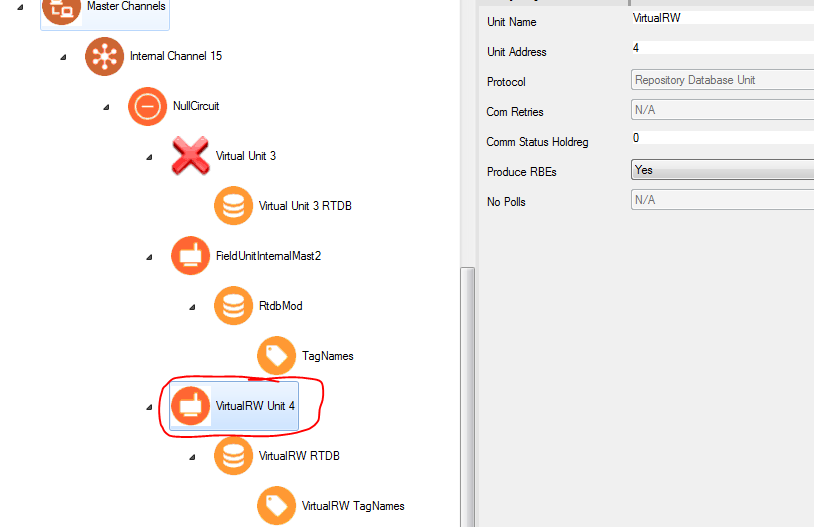
- VirtualRW Unit 4 (paste under NullCircuit)

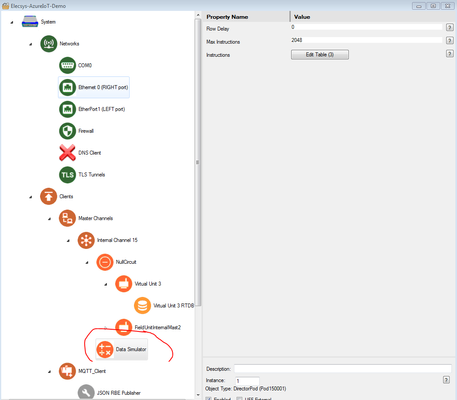
- Data Simulator (paste under Internal Channel 15)

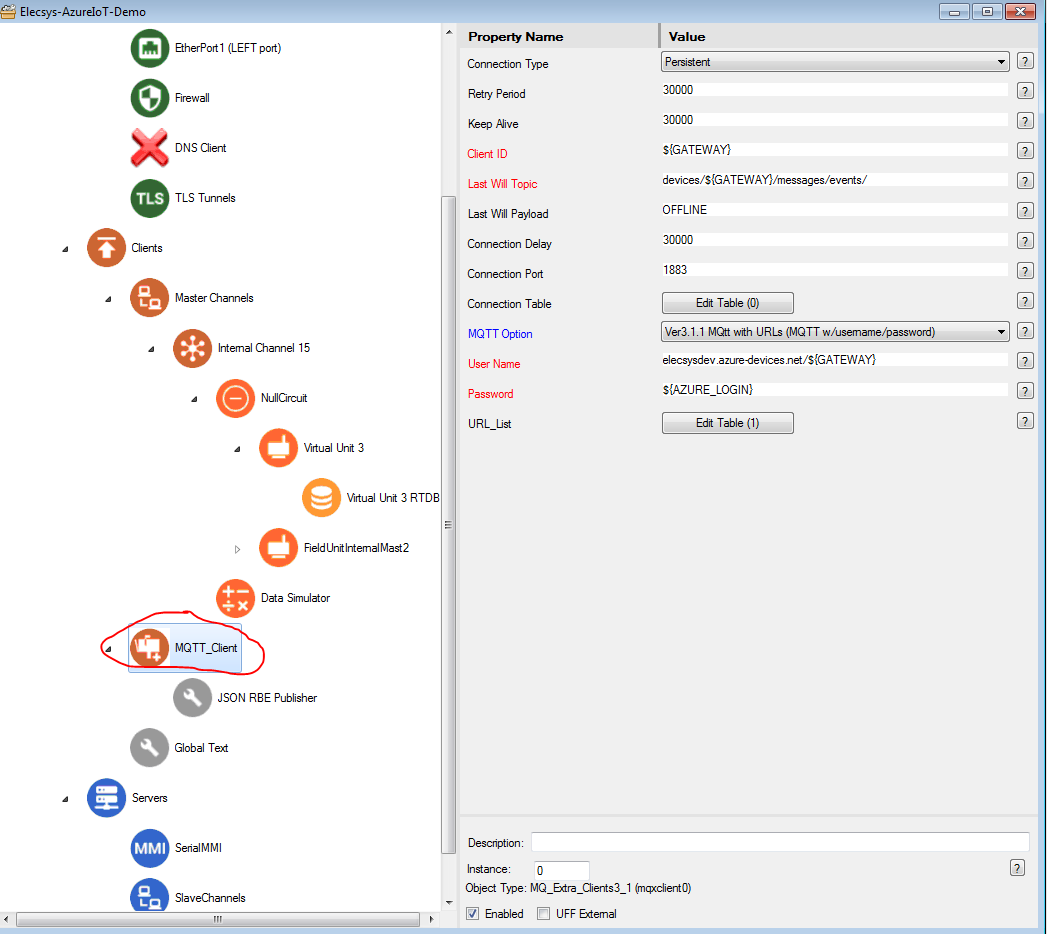
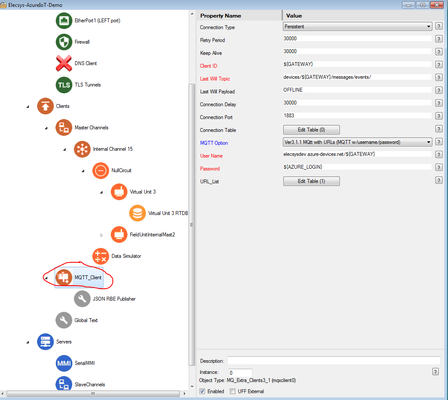
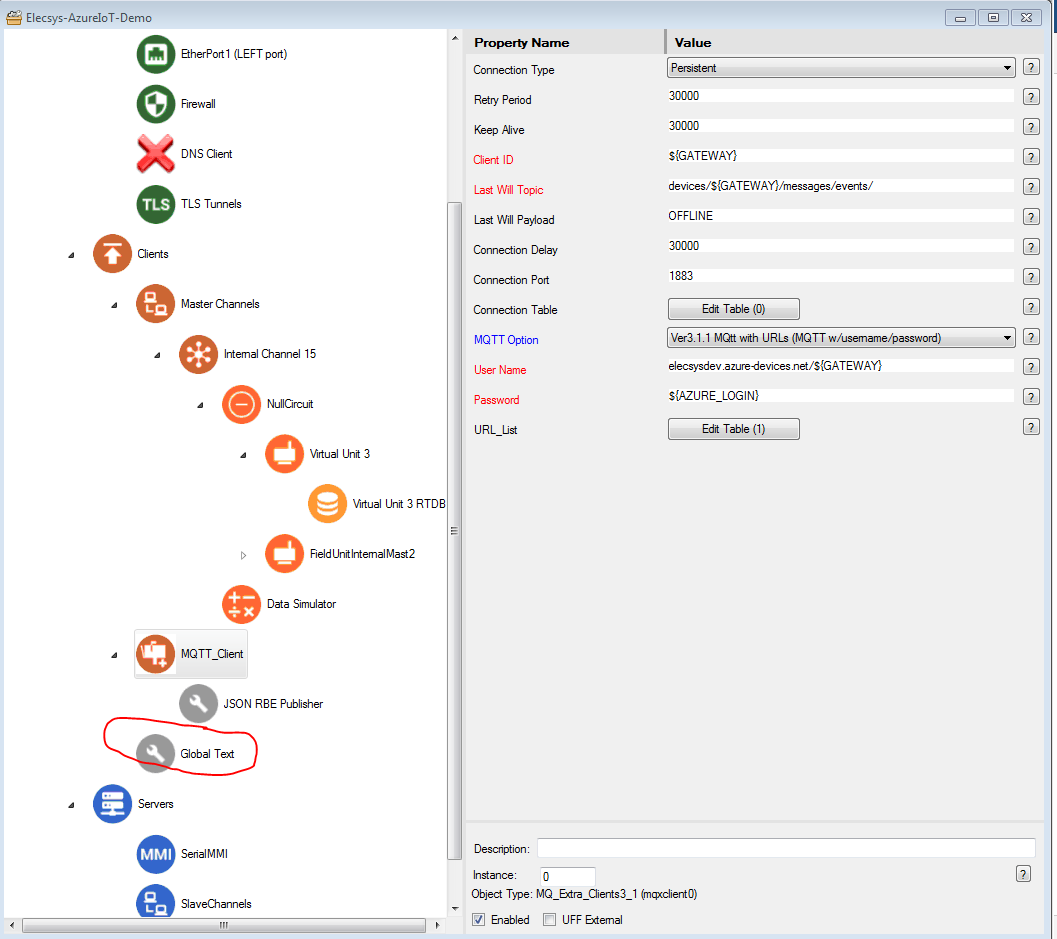
MQTT_Client (paste under Clients)
- Global Text (paste under Clients

Include Page Renaming Nodes Renaming Nodes - TLS Tunnels (paste under Networks)
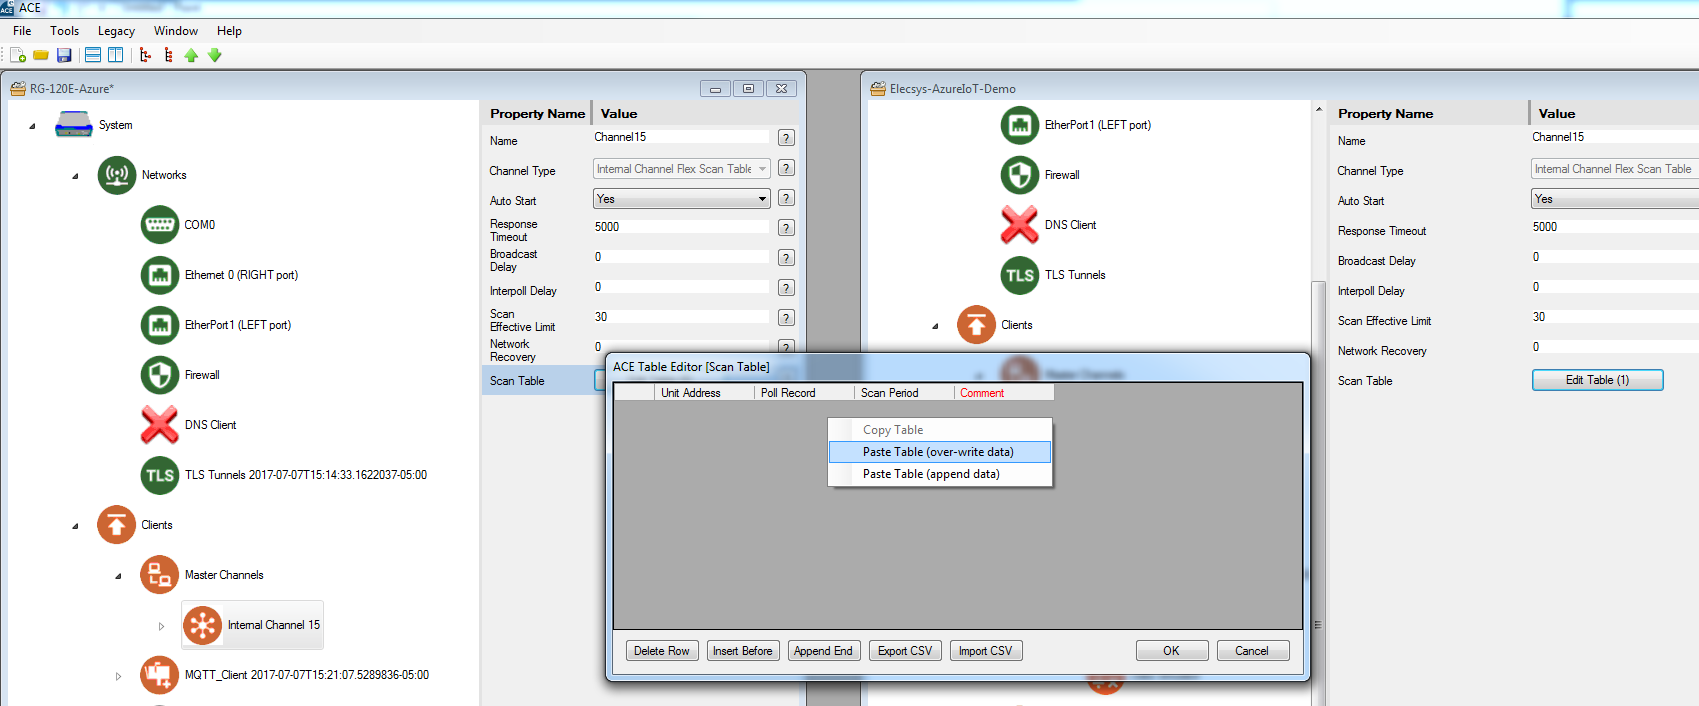
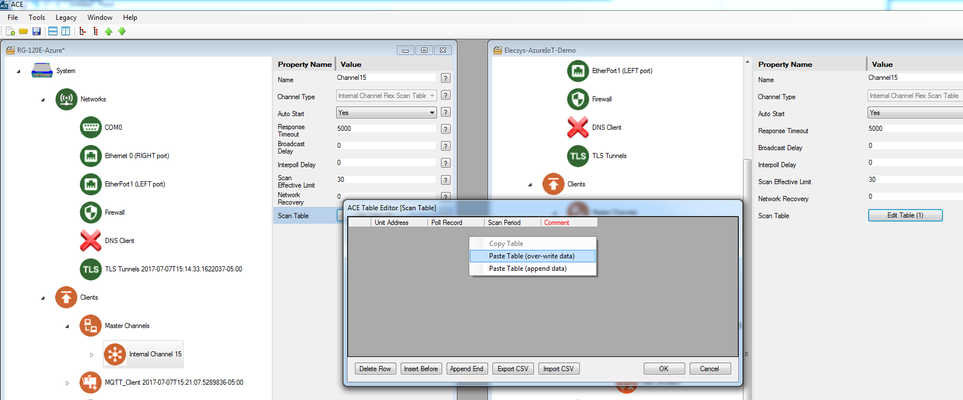
Copy Table data from the Elecsys-AzureIoT-Demo.xml Internal Channel 15 → Scan Table into your RediGate Configuration (in Internal Channel, open Scan Table, right-click and select Paste, over-write data).
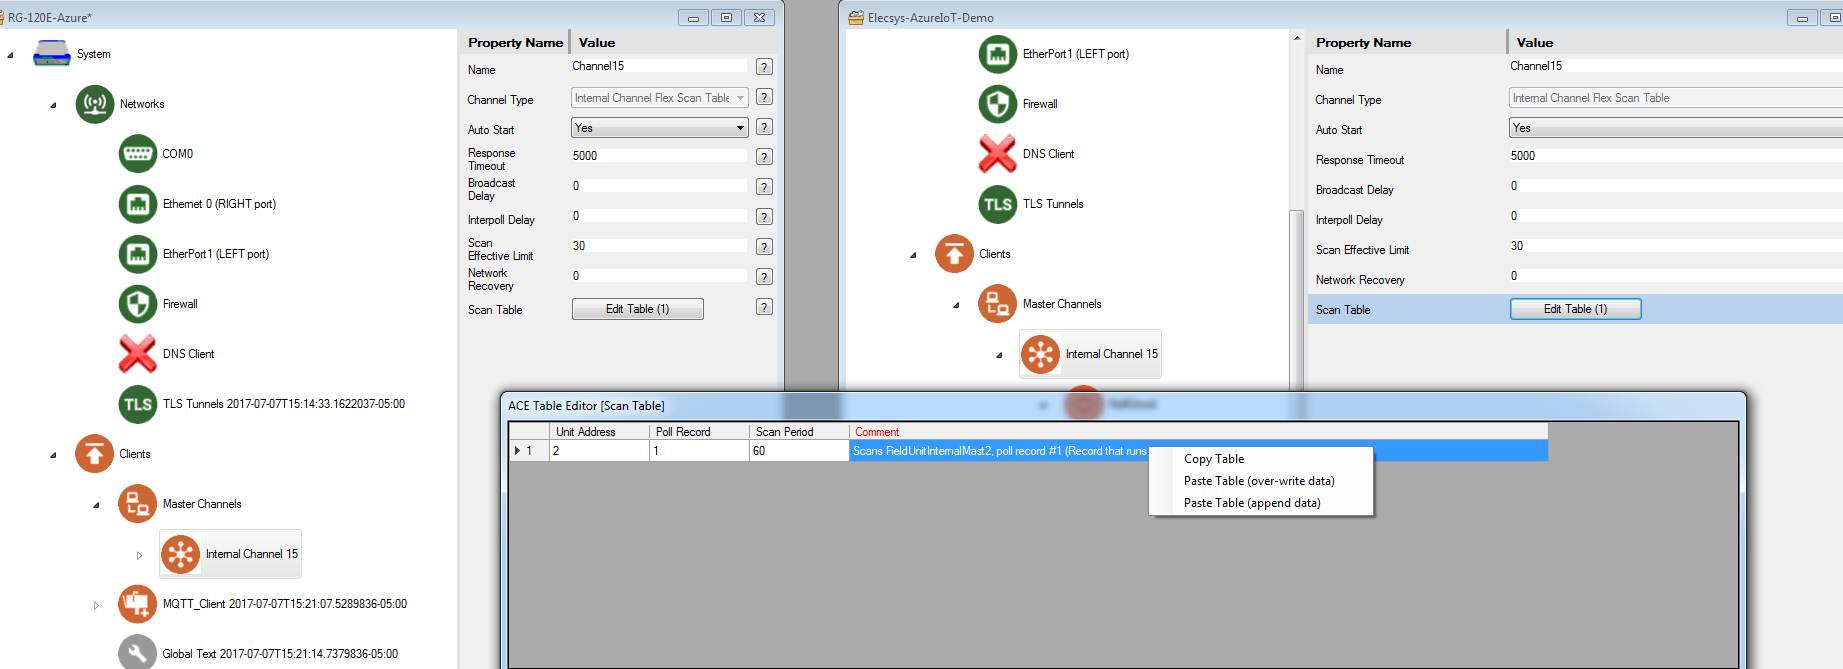
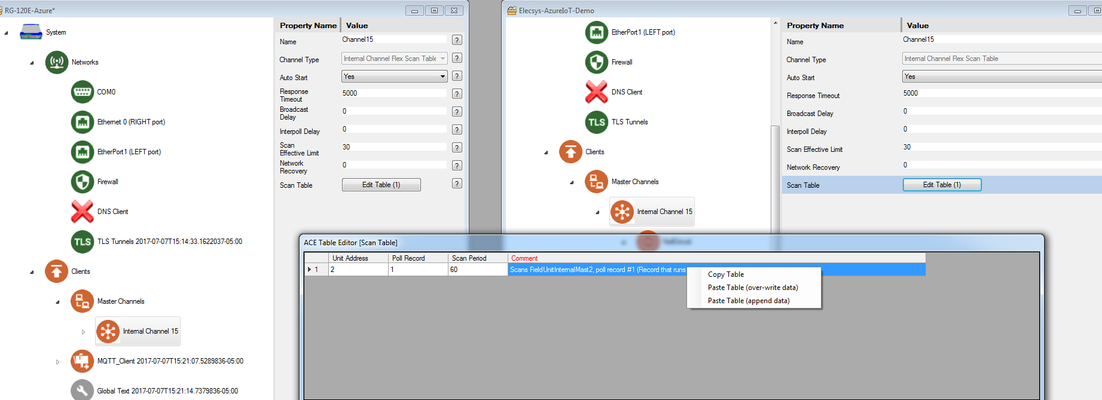
Info title Scan Table Info The "Scan Table" object tells the RediGate which RTU (Unit 2, the data simulator) to run at an interval (Scan Period) which is set to every 600 seconds. This is how frequently the RediGate will check the data simulator for changes, which will result in data being published every 10 minutes. You can change this to whatever number you would like, however you will want to keep an eye on the number of messages published as Azure charges on a per message basis.
- Update your MQTT_Client properties to match the parameters in your Azure IoT Hub account:
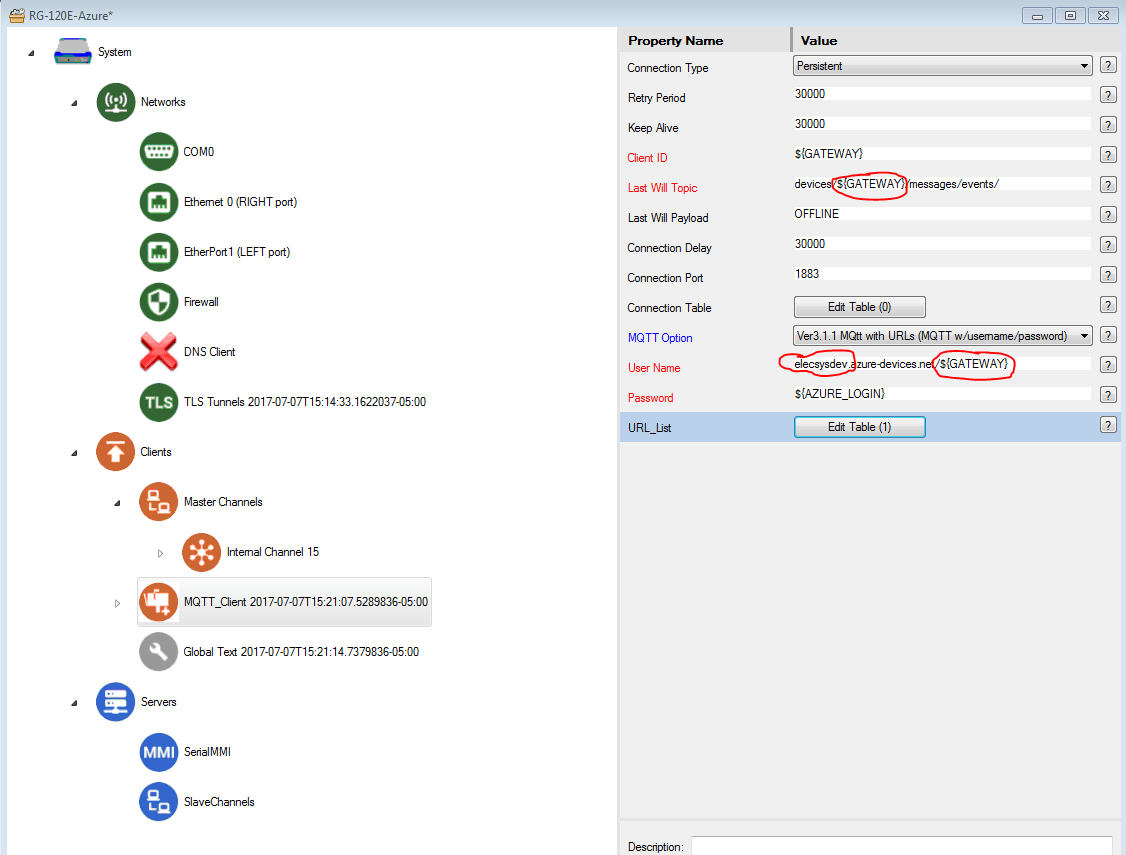
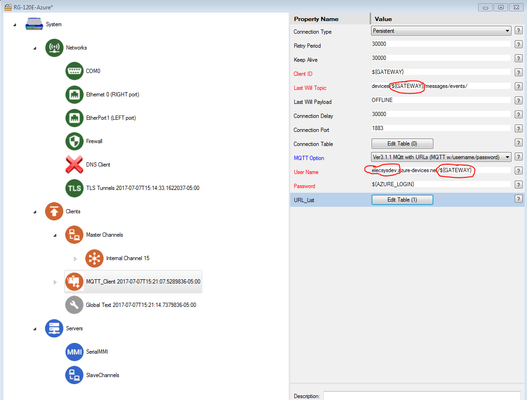
- The ${GATEWAY} parameter references the System → Unit Name value, which in the default configuration is "RediGate120E".
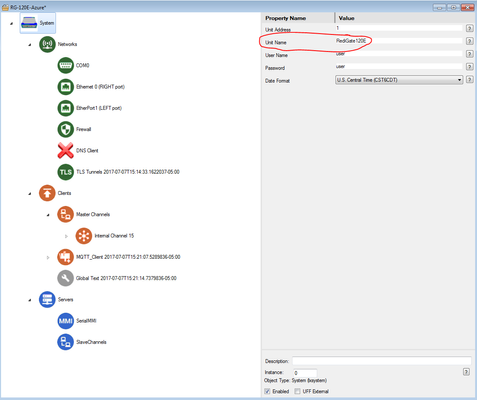
- You will need to change your "System → Unit Name" property to match the "Device Id" of the registered device in the Azure IoT Hub. In the screenshot below, the device ID of "RediGate120E" matches that of the default configuration.
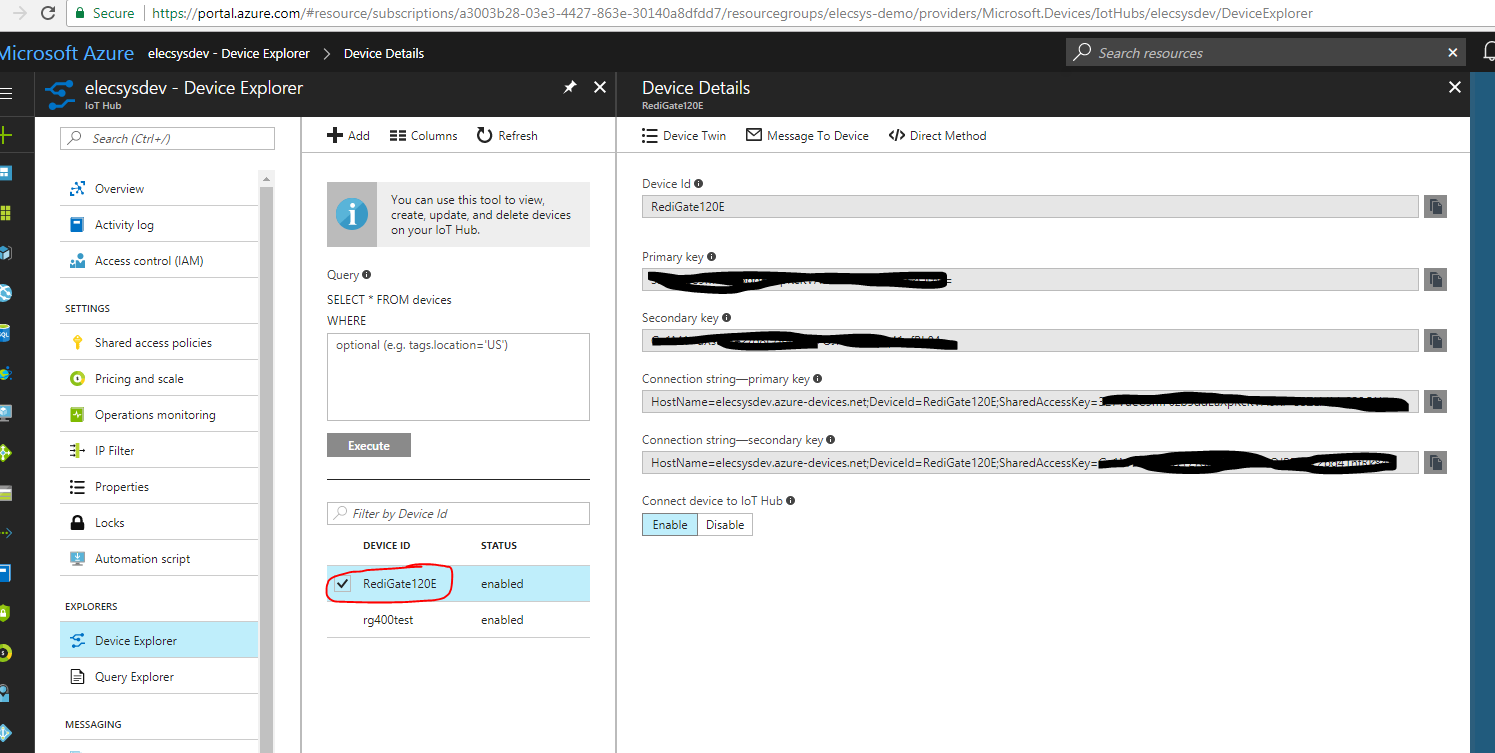
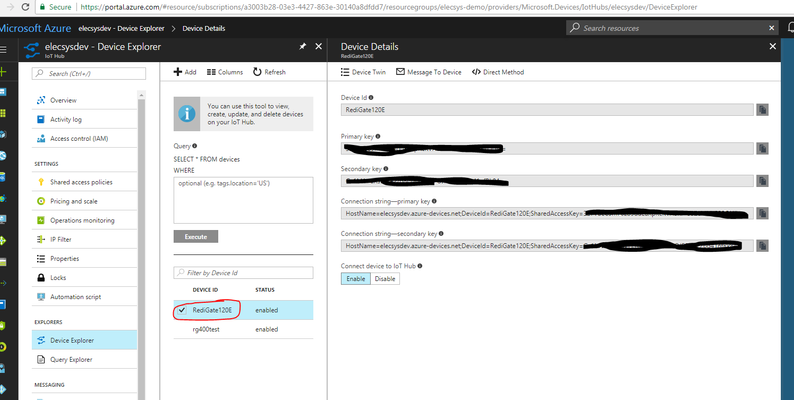
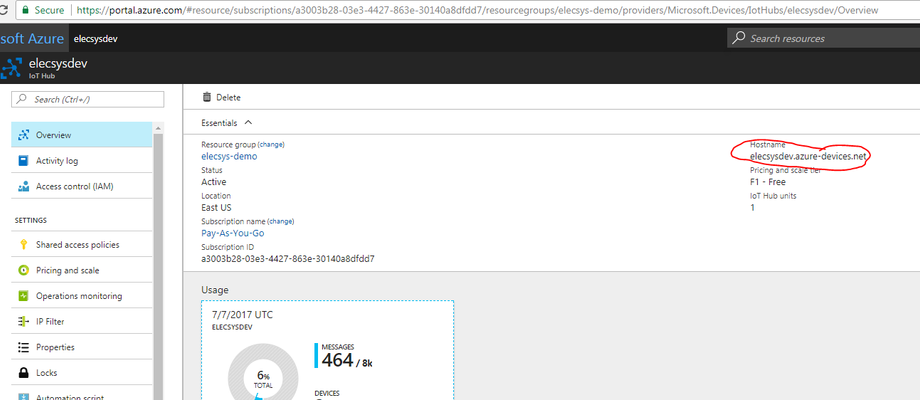
- The "MQTT_Client → User Name" property needs to match the "Hostname" property in Azure IoT Hub, followed by /deviceID at the end of the URL (in our case /${GATEWAY} since that is what we are using for our Device ID).
- The ${GATEWAY} parameter references the System → Unit Name value, which in the default configuration is "RediGate120E".
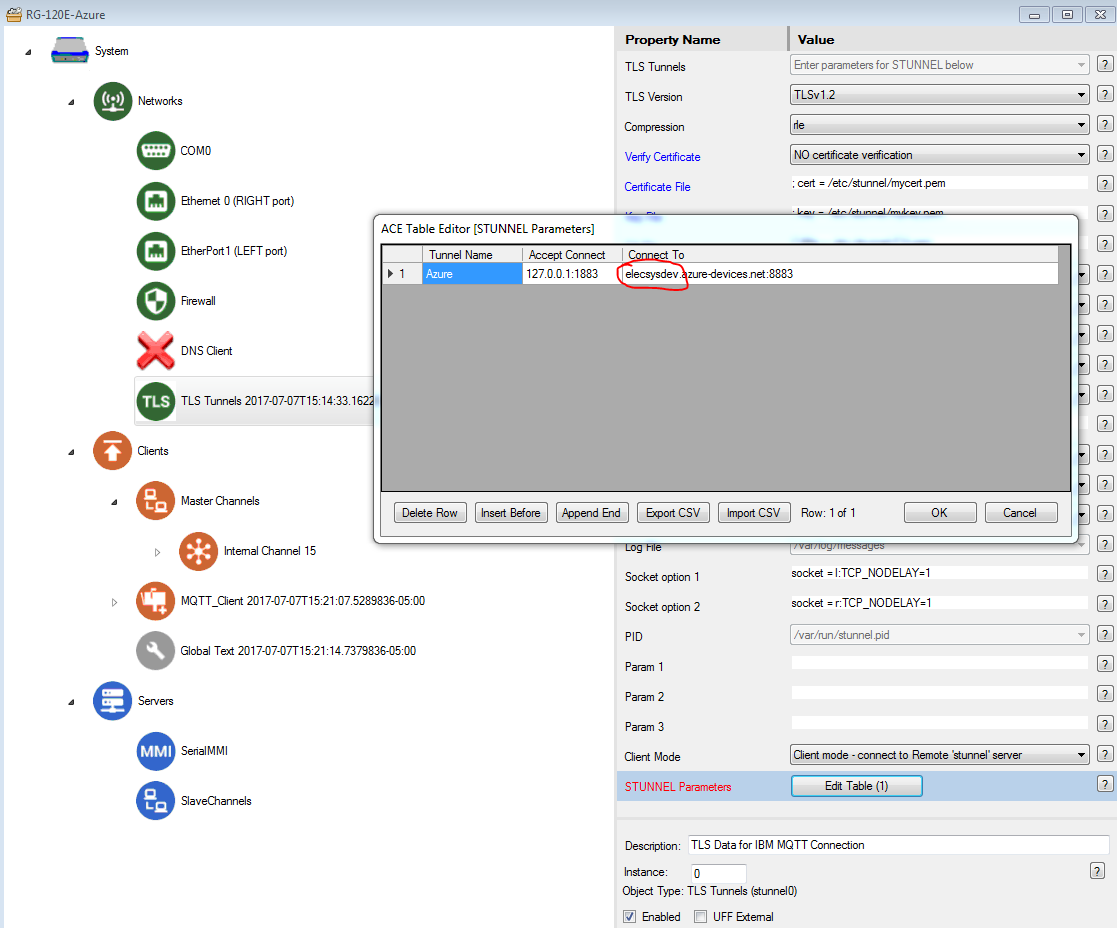
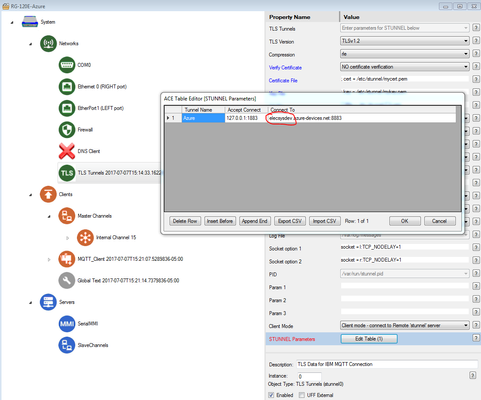
- Update the "TLS Tunnels → STUNNEL Parameters" property to match the "Hostname" property of your Azure IoT hub, followed by :8883
- Use the Azure "Device Explorer Twin" software tool (https://github.com/Azure/azure-iot-sdks/releases/download/2016-11-17/SetupDeviceExplorer.msi) to create a SharedAccessSignature
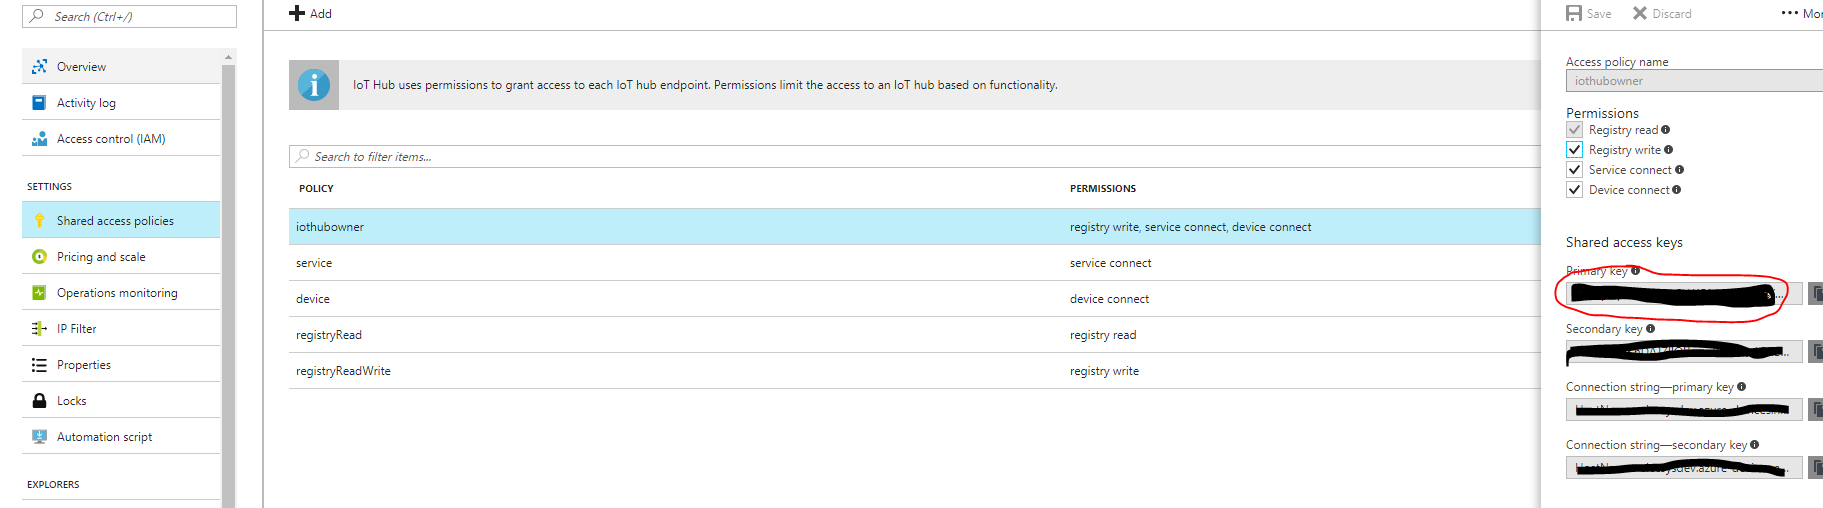
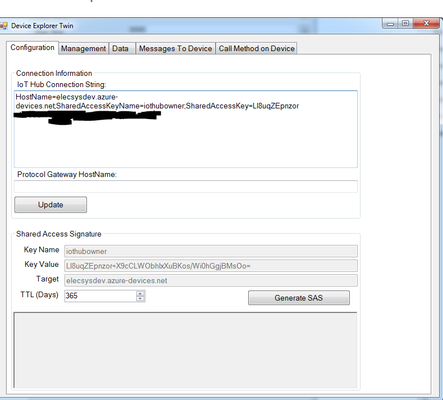
- Find the "SharedAccessKeyConnection string – primary key" for the "iothubowner" user in Azure.

- Enter the Copy these credentials into the "Connection Information" section on the "Device Explorer Twin". In this example, we use HostName=elecsysdev.azure-devices.net;SharedAccessKeyName=iothubowner;SharedAccessKey={iothubowner Primary Key from above}
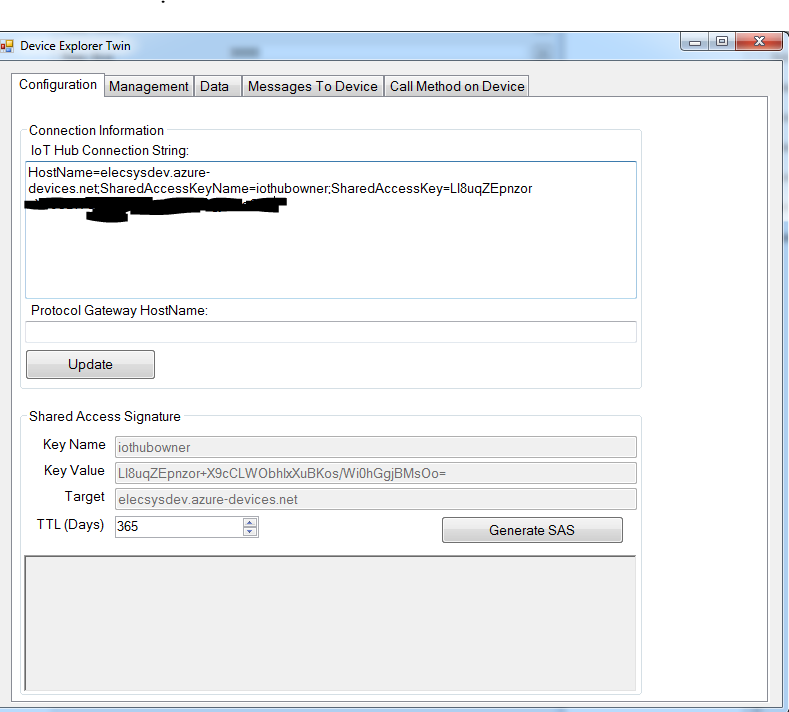
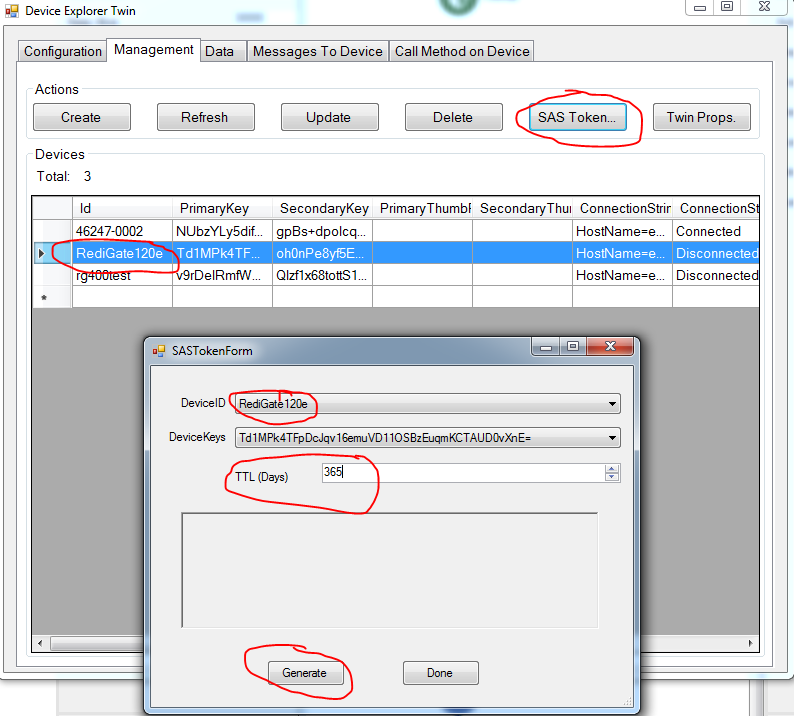
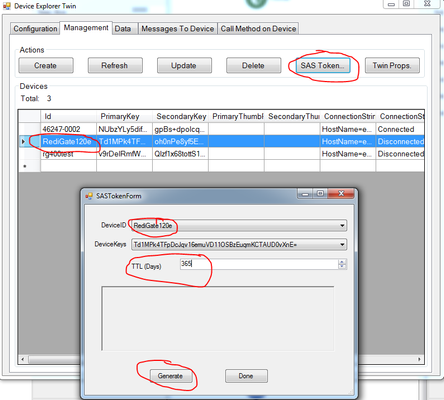
- Once you have a successful connection in the "Device Explorer Twin", navigate to the "Management" tab and select the appropriate Device ID, press the "SAS Token" button, set the appropriate TTL (days of validity for the device key), and click "Generate"
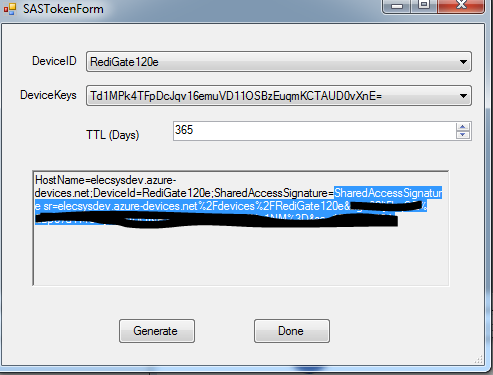
- Copy the highlighted section below from your SASTokenForm beginning after the ";SharedAccessSignature=". Paste into the first row of the "Global Text" object of your RediGate configuration, in the "Replacement Text" column.


- Find the "SharedAccessKeyConnection string – primary key" for the "iothubowner" user in Azure.
- Upload configuration to your RediGate
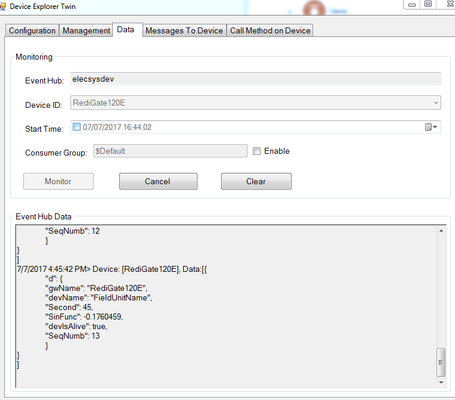
- Confirm that data is being published every 10 minutes using the "Device Explorer Twin" Data tab:
...
- Copy and paste the "VirtualRW Unit 4" field unit from Elecsys-AzureIoT-Demo into your configuration

- Upload configuration to your RediGate
- Open the Microsoft "Device Explorer Twin" software, and perform the following steps:
- Select the "Messages To Device Tab"
- Select your device from the "Device ID" dropdown, and copy the following text into the "Message" field: {"d": {"IntValue": 150}}
- Enter "device" for the "Key" field and "VirtualRW_" for the "Value" field (make sure to include the underscore character _ after the VirtualRW).
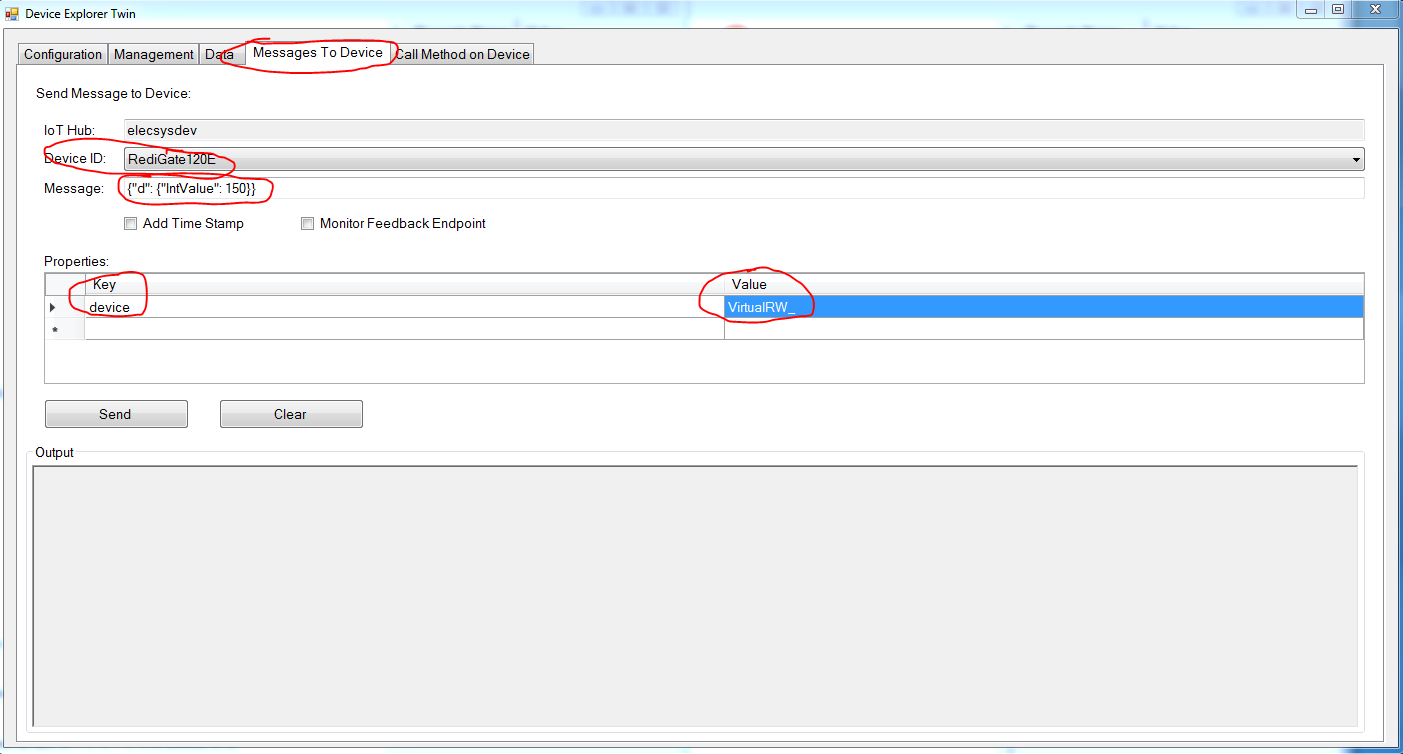
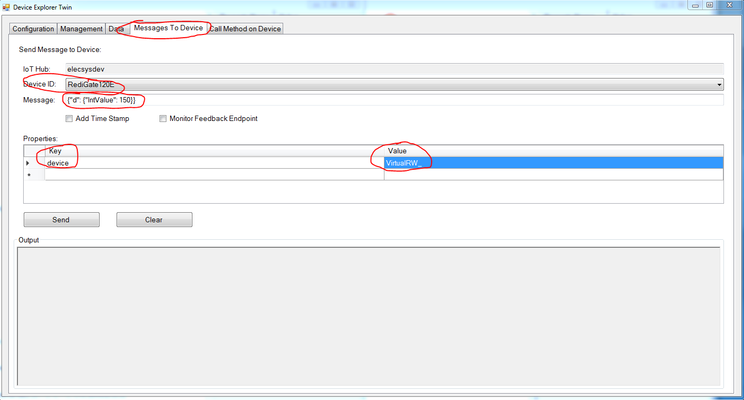
- Click "Send" to send the command to the IoT Hub, which the RediGate will subscribe to and send out to the "IntValue" tag under VirtualRW RTU

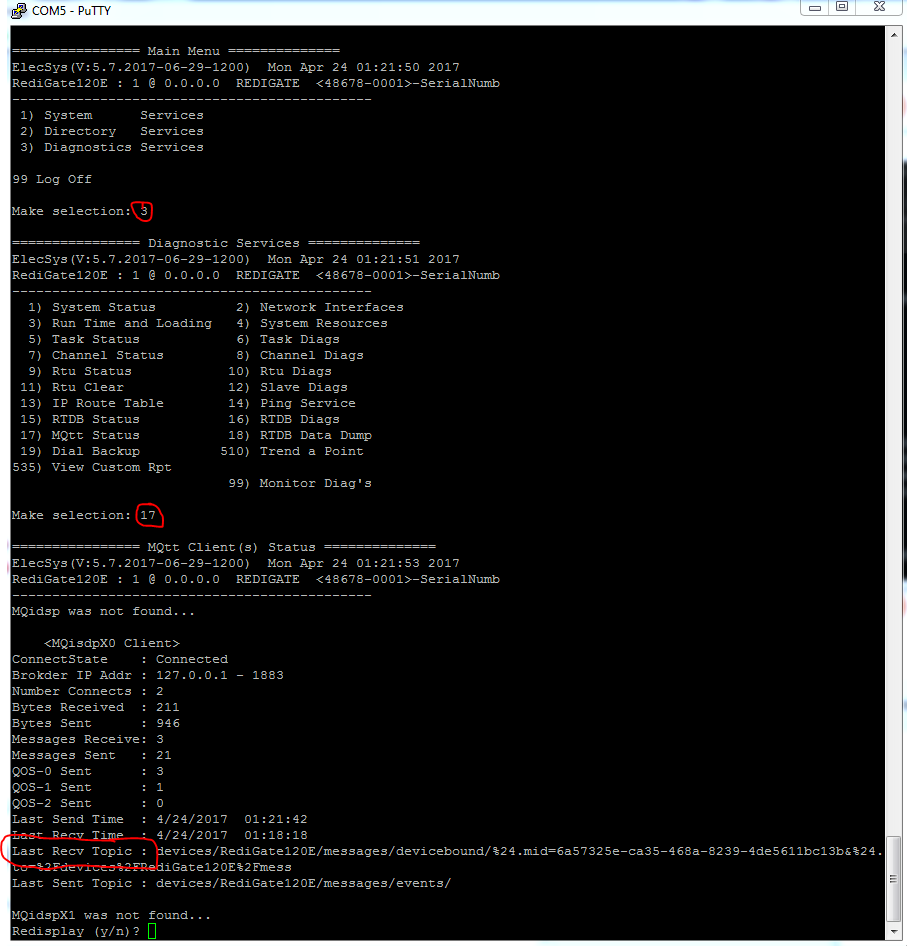
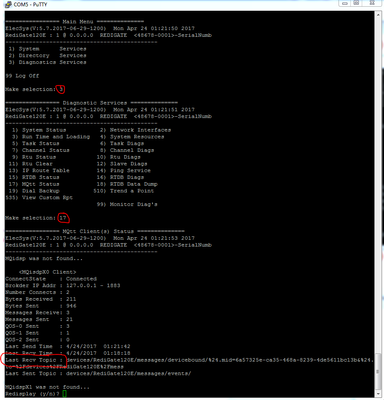
- Confirm that the data was written to the RediGate by logging in to the RediGate with Putty and accessing MQTT Client Diagnostic screen (Option 3 → 17). Here you should see a value in the "Last Recv Topic" that looks similar to the screenshot below:
- The value that you published should be saved in the Internal Channel 15 → Virtual RTU 4 → RTDB → Register 30001. See Accessing RTDB Data Dump for info on viewing RTDB values in the RediGate
...