Any network device is potentially vulnerable to unauthorized login, and you should take appropriate security precautions to protect access to the RediGate. This is particularly true if your RediGate has a public static IP address, where it may be vulnerable to repeated hack attempts via bots crawling the Internet looking for open IP addresses. The following suggestions are given for a few security precautions.
You should always consult with your IT department for security recommendations before placing the RediGate or any device in a mission critical application.
Change Password
The easiest way to prevent unwanted logins is by changing the username and password in the "System" object to something more secure than the default value:
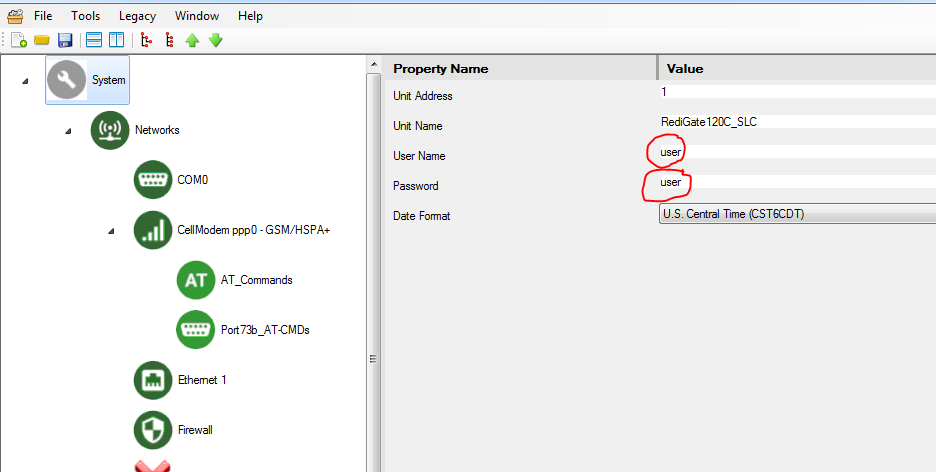
In general, you should regularly update both the user name and/or password, and the 'root' password, particularly if the RediGate is operating on a public network.
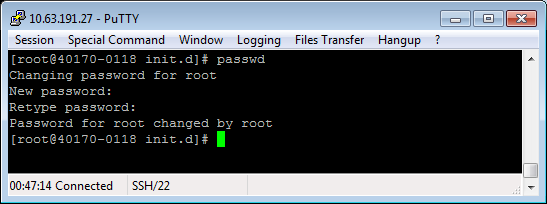
The 'root' password cannot be changed through the ACE configuration. It may be changed from a Linux command line by logging in as 'root' with the existing password, and using the passwd command:
Check for Unauthorized Logins
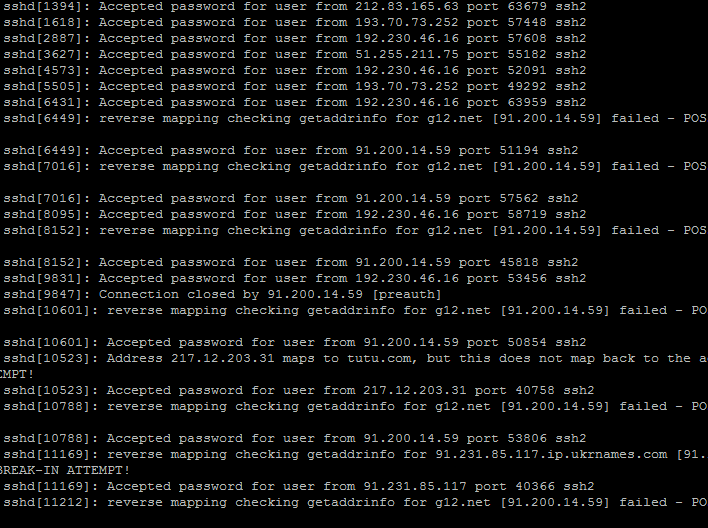
To check if your RediGate is experiencing unauthorized login attempts, login to the RediGate as the 'root' user and run the following command: cat /var/log/auth.log
This screenshot shows the auth.log file of a RediGate experiencing unauthorized logins:
Block Repeated Password Attempts
To hamper the efforts of hackers or bots using repeated login attempts, you can add a firewall rule that will lock out a user if they fail a login too many times in a row. Use the "Custom IPTABLES" option in the Firewall configuration to add several rows, such as in the following example:

The tilde (~) indicates a continuation to the next row. The seconds (120) and hitcount (4) can be adjusted as needed.
# The following lines block SSH attempts after 3 tries, for 2 minutes
iptables -A INPUT -p tcp --dport 22 -m state --state NEW -m recent --set ~
--name SSH
iptables -A INPUT -p tcp --dport 22 -m state --state NEW -m recent --update ~
--seconds 120 --hitcount 4 --rttl --name SSH -j DROP
# NOTE: Do NOT add ppp0 (port 22) into Port Management, only do it here
iptables -A INPUT -p tcp -i ppp0 --dport 22 -j ACCEPT
In addition, the Firewall "INPUT Policy" should be set to "Drop All Input Packets," and the "Port Management" section of the Firewall configuration should not include an "ACCEPT Packet" rule for port 22 on the public network.
Instead, the last line (above) in Custom IPTABLES should be used to ACCEPT port 22 over the cellular (ppp0) and/or Ethernet (eth0, eth1, etc.) interface. This line (or lines, for multiple interfaces) must come after the preceding lines that check whether to block repeated failed SSH login attempts.
Block all SSH, Use VPN Instead
Another option is to block all access to port 22 on the public ppp0 interface using the Port Management section of the Firewall object in your ACE configuration:
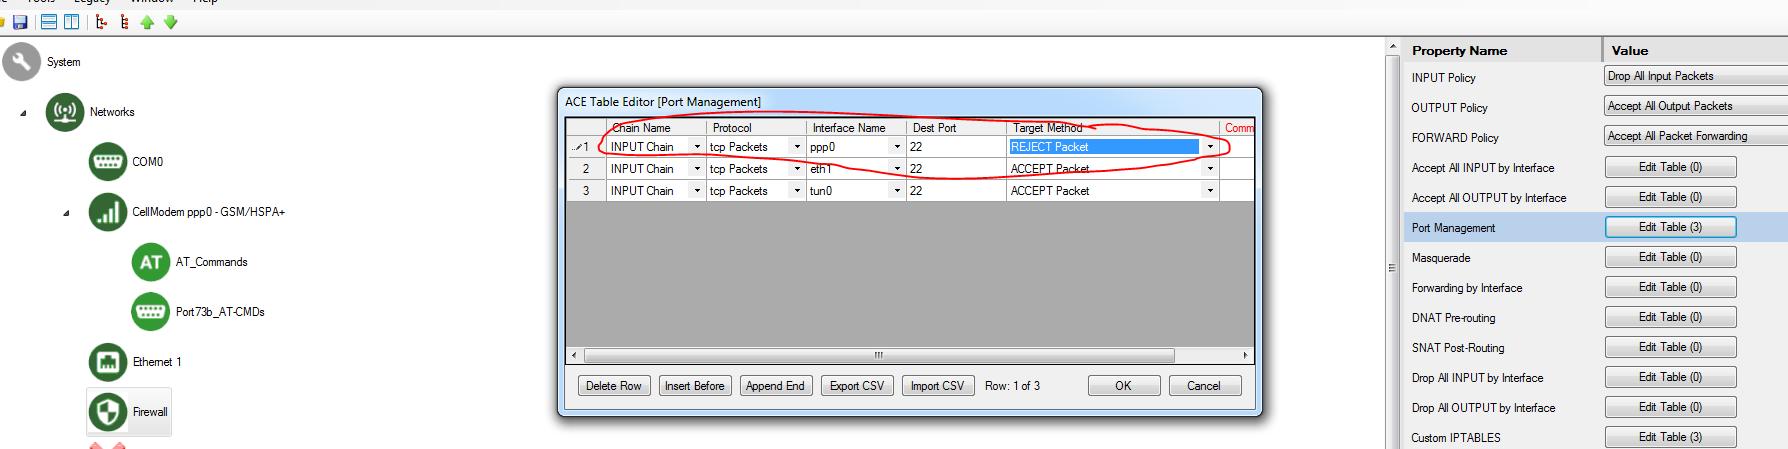
In the configuration above, port 22 access is blocked over the public cellular network (ppp0), but allowed over the VPN connection (tun0).