...
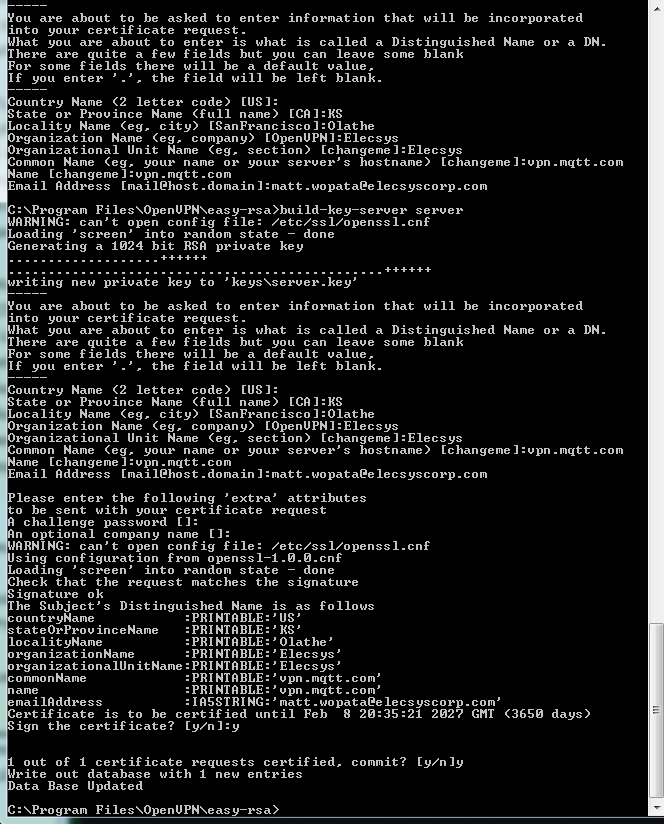
Note that in the above sequence, most queried parameters were defaulted to the values set in the vars or vars.bat files. The only parameter which must be explicitly entered is the Common Name. In the example above, I used "OpenVPN-CA". Generate certificate & key for serverNext, we will generate a certificate and private key for the server. On Linux/BSD/Unix: ./build-key-server server On Windows: build-key-server server |
For "server", make sure you put the IP address of the server as indicated by the default certificate:
CA files will be found here: C:\Program Files\OpenVPN\easy-rsa\keys
Upload them to the certificates section on the server
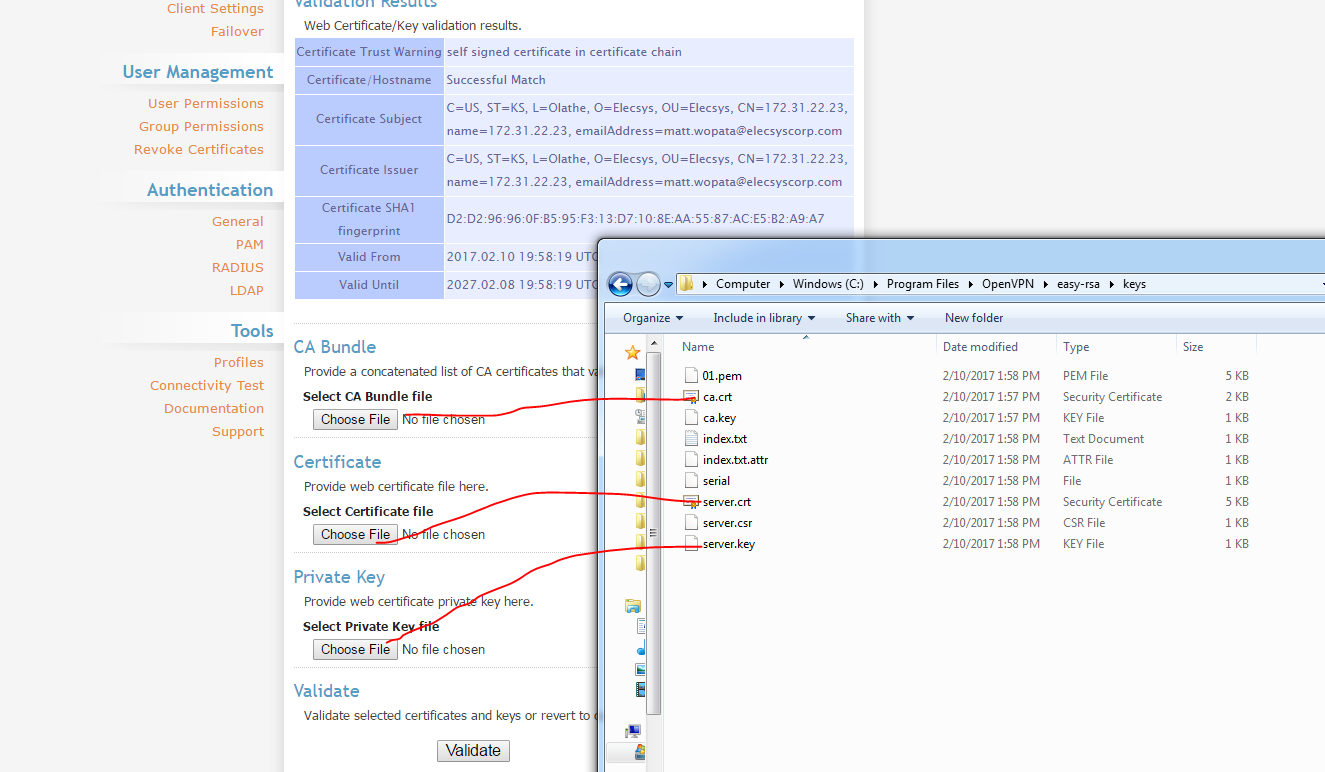
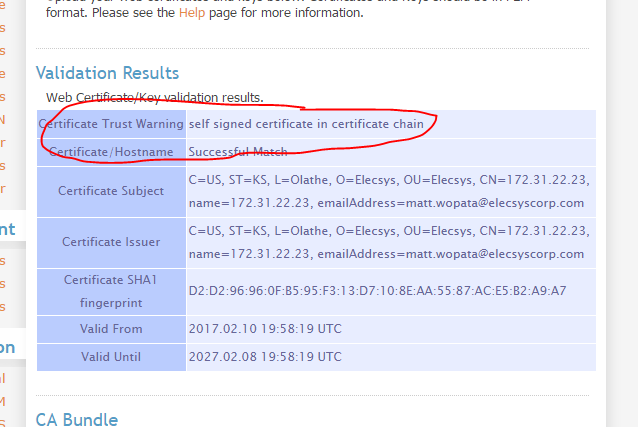
View Successful Match
Creating OpenVPN User and Configuration File for RediGate
Creating OpenVPN Configuration File for RediGate
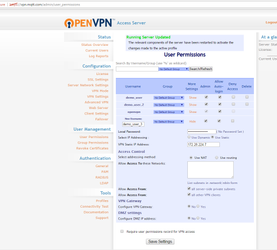
- Create a new user using the OpenVPN web interface
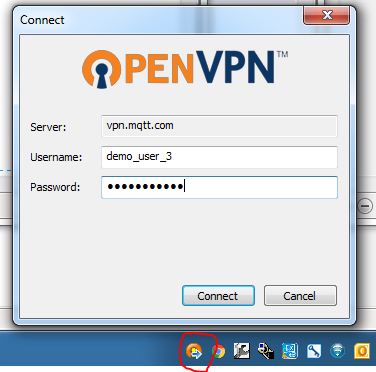
- Create a connection with those user's credentials using your PC's "VPN Connect App", however BE CAREFUL. You do not want to click through all the options because the next step requires copying and saving the text from one of the dialog boxes.
- Copy and paste the credentials generated by the "OpenVPN - Warning" into a text document, omitting the top line that reads "OpenVPN configuration file:"
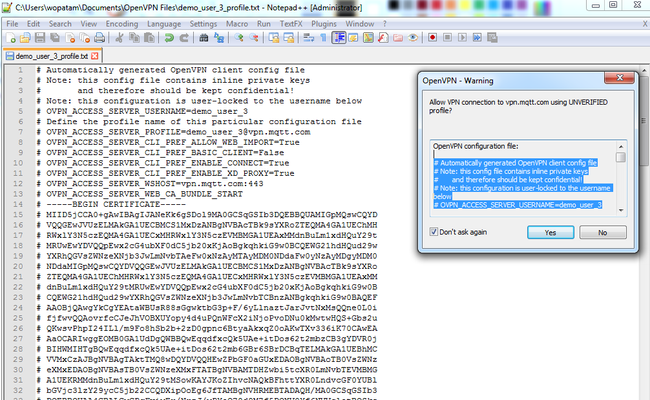
- Edit ~Line 58 of the the text document with the following so that the text reads "auth-user-pass /etc/openvpn/auth.txt"
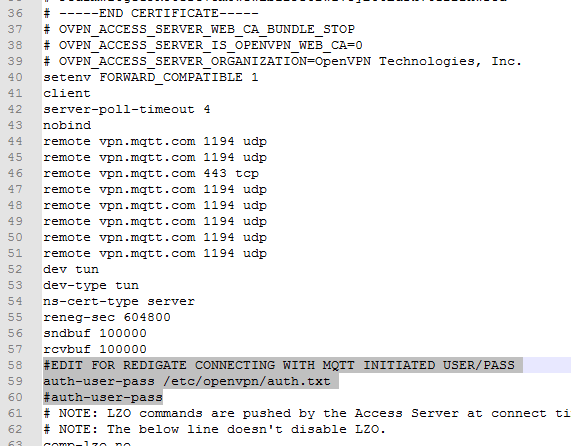
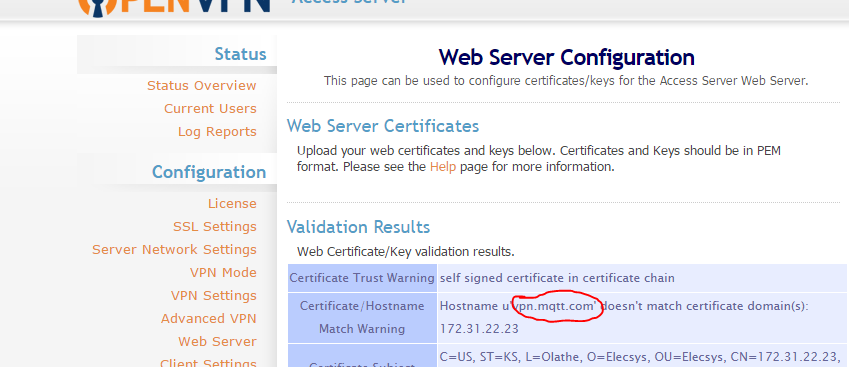
- NOTE: Lines 44 to 51 of your file should not contain "vpn.mqtt.com" – they should read the IP address or server name of your OpenVPN server
- Save the file as "OpenVPN_CONF.txt" and load the text file onto the RediGate
- Method 1 - Upload Additional Files using ACE
- Confirm tha tthe name of the OpenVPN configuration file to be loaded onto the RediGate is less than 32 characters in length
- Open the ACE configuration to be loaded onto the RediGate, and select the "Upload Additional Files" checkbox
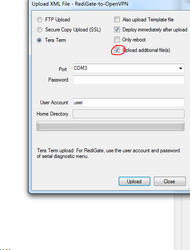
- Click "Upload" and browse to the OpenVPN_CONF.txt file you created in the previous steps
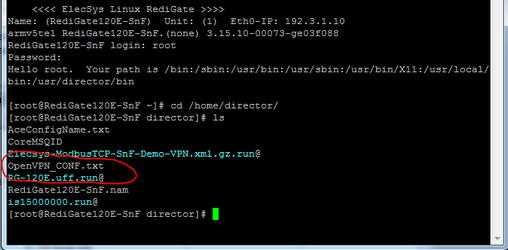
- Once the upload is complete, you should see the configuration file on the RediGate. The location of the configuration file will depend on the account used to upload the configuration/file:
- "user" account: /home/director
- "root" account: /home/director
- "Dirupld" account: /home/Dirupld
- Method 1 - Upload Additional Files using ACE
Updating Settings and Starting VPN via MQTT and Ignition
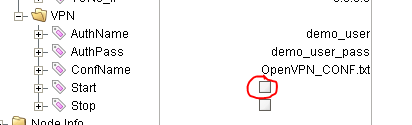
Update VPN Settings via MQTT
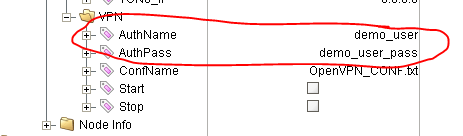
- Change the "AuthName" and "AuthPass" values to match those of the user whose configuration you uploaded
Confirm all settings are correct, and send a "1" value to the the "VPN.Start" tag to initiate the connection. For examples on how to send MQTT values to non-Ignition systems, see OpenVPN MQTT API Reference
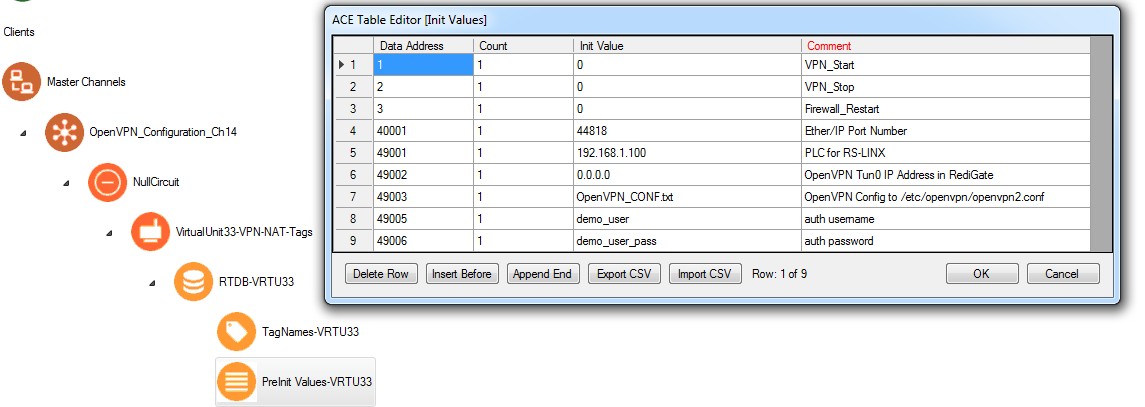
Info title Edit Default MQTT Values You can edit the default values for the AuthName, AuthPass, and OpenVPN_CONF.txt by changing the PreInitRTDB values under the "FieldUnitInternalMaster Fake Virtual Unit 3VirtualUnit3-VPN-NAT-Tags":
- When the "Start" tag is toggled, the RediGate will check the following folders for the filename specified in the OpenVPN_CONF.txt tag (which was set in the previous step), and use that filename as the OpenVPN configuration with the username/password credentials specified in the AuthName and AuthPass tags:
- /home/director
- /home/Dirupld
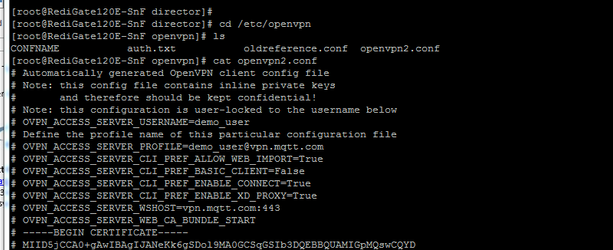
- The RediGate will then move the contents of that file into the file located in /etc/openvpn/openvpn2.conf for future use:
- When the "Start" tag is toggled, the RediGate will check the following folders for the filename specified in the OpenVPN_CONF.txt tag (which was set in the previous step), and use that filename as the OpenVPN configuration with the username/password credentials specified in the AuthName and AuthPass tags:
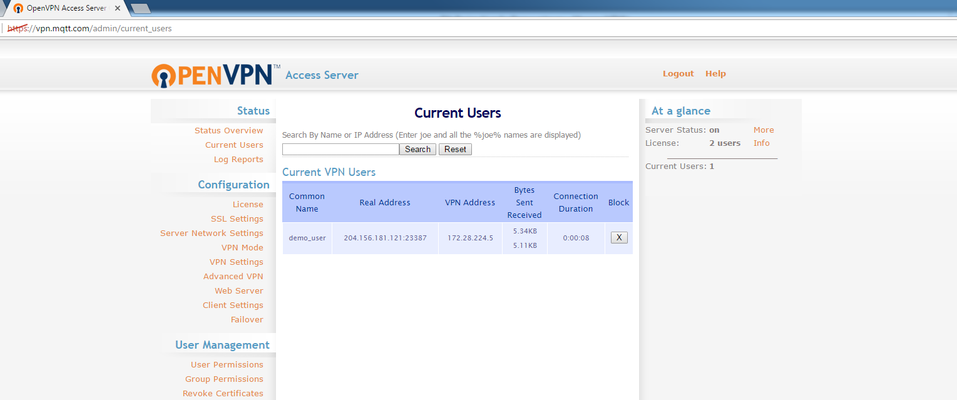
- Confirm that the VPN has started by viewing the client list on the OpenVPN server configuration page