...
- Using ACE, Open the default config you used in the "Getting Started Guide"
Download and open the Elecsys-Ignition-Demo-SPB.xml from http https://ftp.elecsyscorp.com/RediGate/Examples/Elecsys-Ignition-Demo-SPB.zip within the same ACE window as your getting started configuration
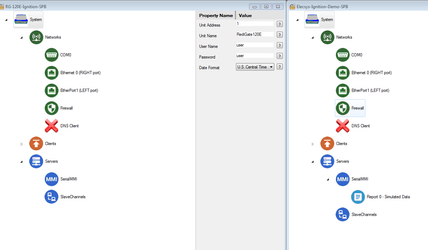
Info You will need to extract the .xml file from the .zip file you downloaded from the website. By default, ACE stores configuration files in the Documents\Elecsys\ACE\CFG folder, but you can store the configuration in any file location accessible by the ACE program. - Copy and paste the following objects from the Elecsys-Ignition-Demo-SPB config into the configuration you created in the "Getting Started" guide:
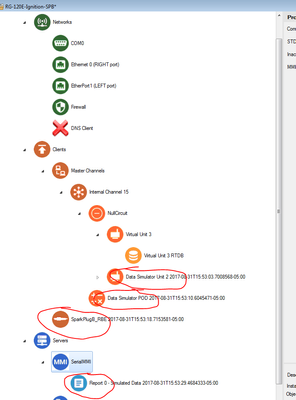
- Data Simulator Unit 2 (Paste under "Null Circuit")
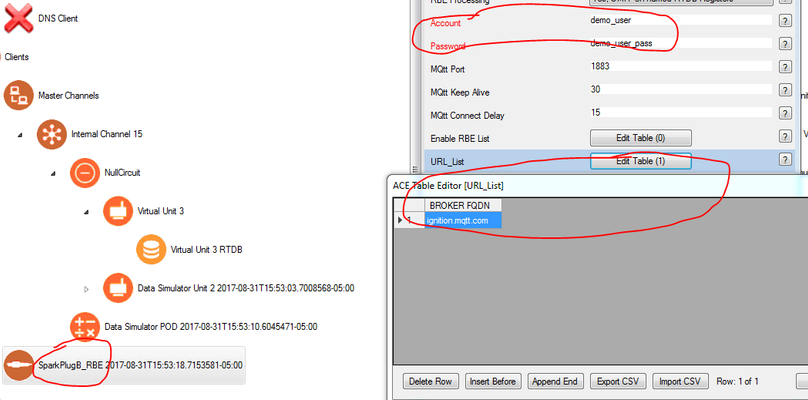
- Data Simulator POD (Paste under "Internal Channel 15")
- SparkPlugB_RBE (Paste under "Clients")
- Report 0 - Simulated Data (Paste under "Master Channels")
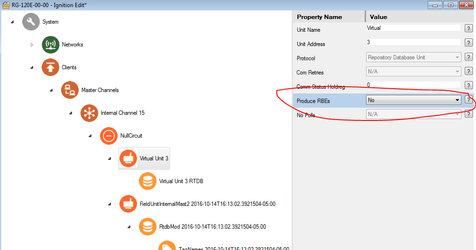
Include Page Renaming Nodes Renaming Nodes - Under the "Virtual Unit 3" object, change the "Produce RBEs" value to "No"
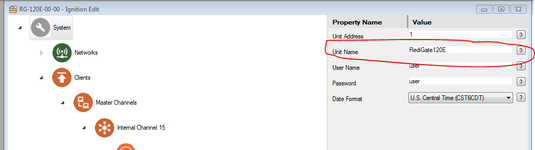
- Change the System → Unit Name parameter to something unique to your device
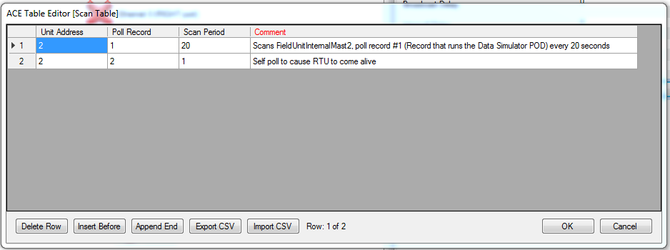
- Update the "Internal Channel 15" object's scan table so that it scans the poll table in the FieldUnitInternalMast2 object we added, and also performs a "self-poll" so the RediGate knowns a poll has been completed and thus marks the simulation RTU as alive:
- Save your configuration with a different name than your default config
- Upload the configuration to your device
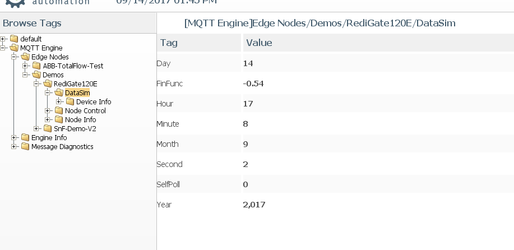
- Visit http://ignition.mqtt.com and launch the "Public MQTT Tags" application
- Username: demo_user
- Password: demo_user_pass
- You should be able to view the tags that correspond with your System → Unit Name
- If you have your own Ignition + Cirrus-Link Modules server you would like to publish the data to, simply edit the "SparkPlugB_RBE" object so that it has the correct server credentials:
- To setup a TLS connection using port 8883 instead of the basic 1883 port, see TLS Connection to MQTT Broker