There are a few ways to set up a temporary Ethernet IP address in a RediGate.
You might want to do this, for instance, to put a RediGate onto a local Ethernet LAN in order to connect over the network and load new configuration or system software.
Gaining Access to the RediGate
To set a temporary IP address, you need to have access into the RediGate. This may be done either
- Through the local serial port (see ACE 'Connect to Device' Menu, or Setting up PuTTY for Serial Communication, or Setting Up Putty for USB Connection);
- Through an available Ethernet or cellular IP network (see Setting up Putty for Network Communication).
The options available to you depend on whether you have access over a local serial/USB port or IP address, and whether you have root or user-level login permission.
Setting IP Address
Setting IP Address with Local Serial "Bootloader" Option
If you have access to the COM0 serial/USB diagnostics port of the RediGate and only user-level login permission, you can set up a temporary IP address by Interrupting the Bootloader.
Your RediGate must be using a tarball dated 8-16-2017 or later for the Bootloader option to work.
- Connect to the local serial port using a terminal program, such as PuTTY or Tera Term.
- Power cycle or reset the RediGate, and watch the Linux startup messages until you see a big "LOGIN" banner appear.
- Then quickly (within 15 seconds) enter the Bootloader username/password of user/user.
(NOTE: Normally you should not log in at this point, as it will interrupt the RediGate software. Ordinarily, you should wait the 15 seconds and then wait until you see "RediGate Applications Started."
(if you fail to enter it quickly enough, just reboot and try again).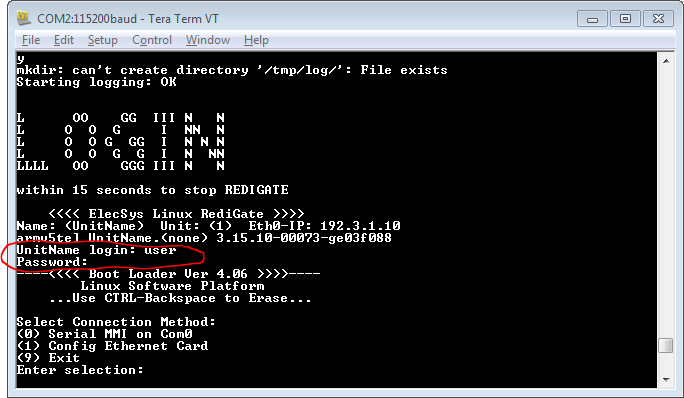
- After logging in, you can enter 1 to configure an IP address of the Ethernet port (eth0 only).
Enter the IP address, Subnet mask, and Default gateway in dotted notation.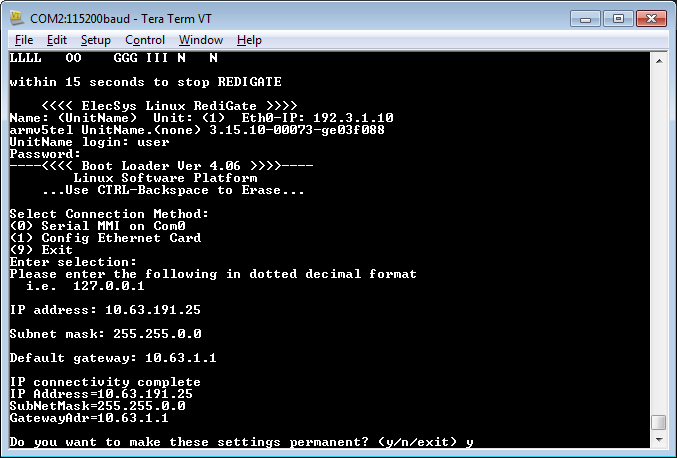
After entering the IP address, enter Y to create a configuration in the file system with the minimal system settings, including IP address. - Enter a user password for the default (temporary) configuration, and then enter Y to reboot.
The configuration will be saved, and a reboot will be triggered automatically after a short delay.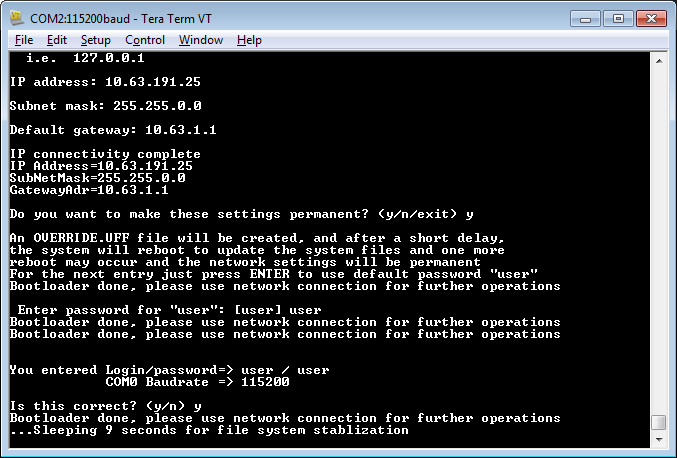
- After the system restarts, you should be able to log into it over the network in order to load a final configuration and other software.