...
- A RediGate 100 or 400 series device with internet connectivity
- Completion of the Getting Started Guide for your respective RediGate device (RediGate 100 Series or RediGate 400 Series)
- IBM Watson IoT account (https://discover-iot.eu-gb.mybluemix.net/?cm_mc_uid=32480403355614666233527&cm_mc_sid_50200000=1467207726#/try/)
- Ability to ping the internet Internet (using DNS, so an address like google.com) from your RediGate
...
- Using ACE, Open the default config configuration you used in the "Getting Started Guide".
- Download and open Elecsys-IBM-Demo.xml from the http://partner.elecsyscorp.com site within the same ACE window.
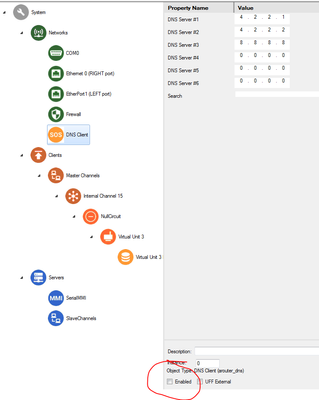
- In your default configconfiguration, enable the DNS Client object by setting its Enabled checkbox.
- Disable Virtual Unit 3 by clearing its Enabled checkbox.
 Copy and paste the following objects from the Elecsys-IBM-Demo.xml config into your default config
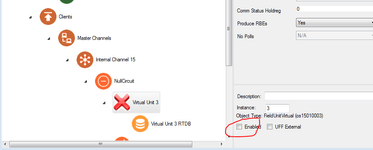
- Copy and paste the following objects from the Elecsys-IBM-Demo.xml config into your default configuration.
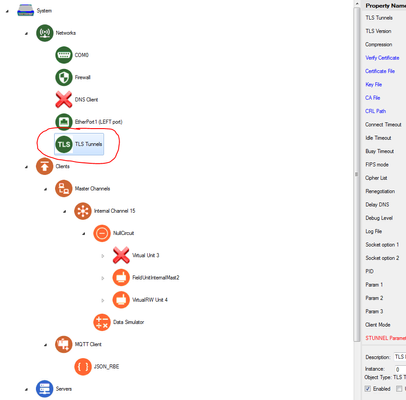
- TLS Tunnels (paste under Networks).
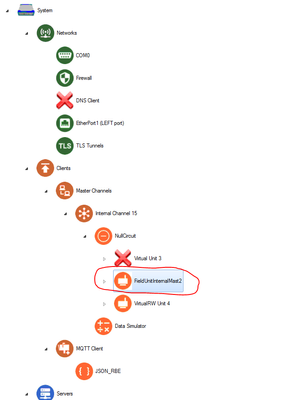
- FieldUnitInternalMast2 (paste under NullCircuit)
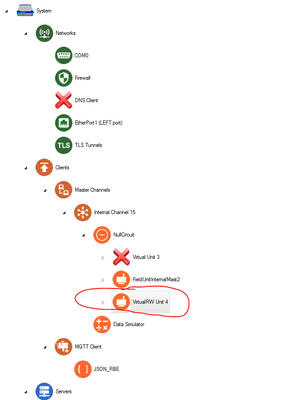
- VirtualRW Unit 4 (paste under NullCircuit)
- Data Simulator (paste under Internal Channel 15)

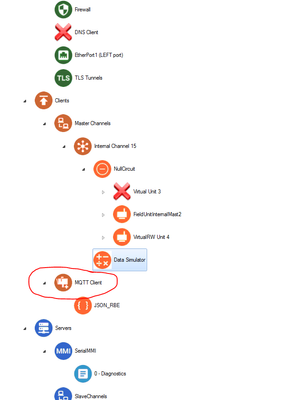
MQTT_Client (paste under Clients)
Include Page Renaming Nodes Renaming Nodes - TLS Tunnels (paste under Networks).
Copy Table data from the Elecsys-IBM-Demo.xml Internal Channel 15 → Scan Table into your RediGate Configuration (in Internal Channel, open Scan Table, right-click and select Paste, over-write data).
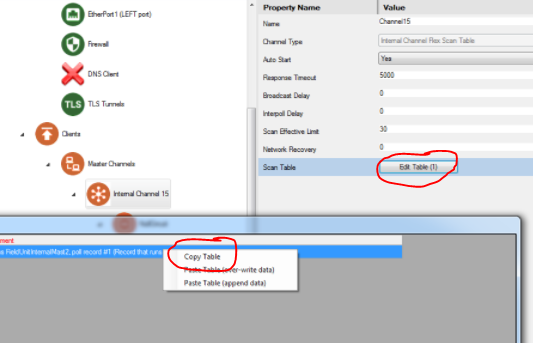
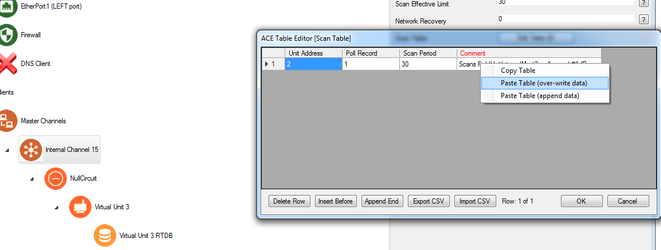
Info title Scan Table Info The "Scan Period" object tells the RediGate which RTU (Unit 2, labeled as FieldUnitInternalMast2) to run at an interval (Scan Period) which is set to every 30 seconds. This is how frequently the data will be published to Watson IoT.
Warning: Data charges may result from excessive usage of Watson IoT service and/or cellular data plan.
- Update your MQClient3_1 → Client ID to match the parameters in your IBM account, as described below.

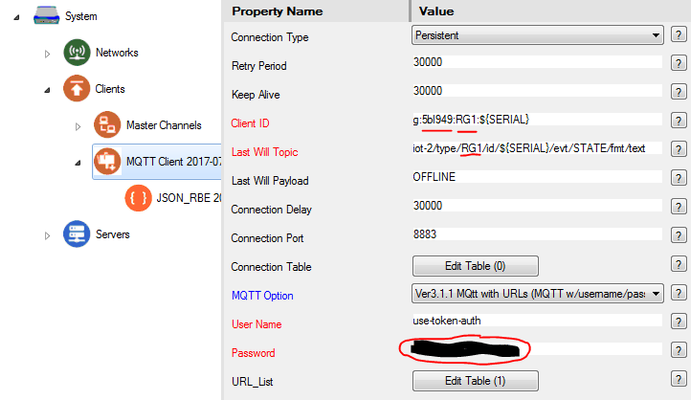
- Client ID: g:orgid:gatewaytype:gatewayid
In this example, the orgid - is 5bl949, gatewaytype is
- RG1.
The gatewayid can be hard-coded, or use ${SERIAL} as a variable that - substitutes for the RediGate
- serial number (
- 40170-
- 0118, in this
- example), or use ${GATEWAY} to substitute for the Unit Name in the System object.
In the Watson IoT platform, you have to add a device with a gatewayid for the Device ID (serial number, unit name, etc.) that matches what will be published from the RediGate.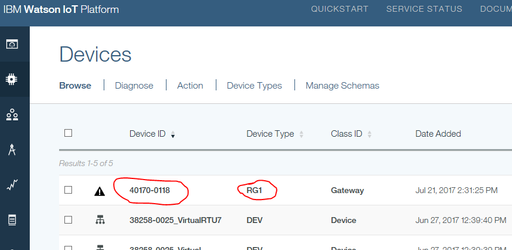
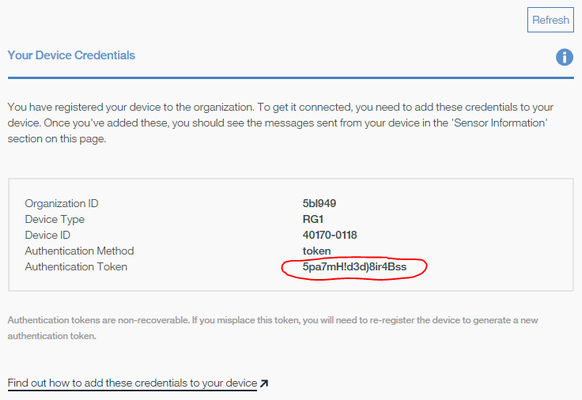
- Password: For the MQTT password, use the "Authentication Token" credentials created for your "Device" in Watson IoT.
- Under the "TLS Tunnels" object, update the STUNNEL Parameters to point to your IBM IoT app
 .
.
The Connect To address should be: orgid.messaging.internetofthings.ibmcloud.com:8883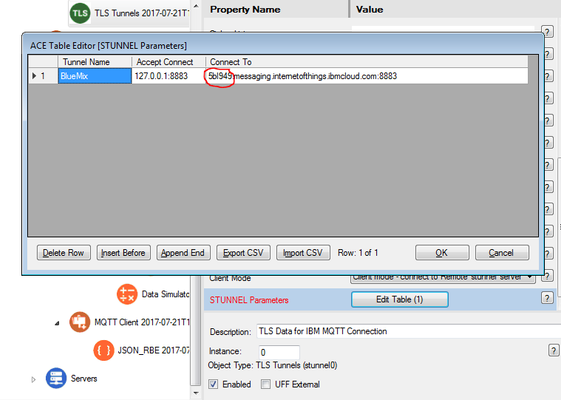
Edit the JSON_RBE → Topic Rules object so that the table entries comply with the rules that IBM expects for your gateway type, device type, etc. See IBM Watson IoT Use Case Notes for more information about acceptable topic architectures
 .
.
The following is given as an example in this configuration (change gatewaytype to match the Device created in your IoT Platform):GATEWAY PUBLISH topic: iot-2/type/gatewaytype/id/${SERIAL}/evt/STAT/fmt/jsonGATEWAY SUBSCRIPTION topic: iot-2/type/gatewaytype/id/${SERIAL}/cmd/SYS/fmt/json
DEVICE PUBLISH topic: iot-2/type/DEV/id/${SERIAL}_${DEV}/evt/RBE/fmt/json
DEVICE SUBSCRIPTION topic: iot-2/type/DEV/id/${SERIAL}_${DEV}/cmd/CMD/fmt/json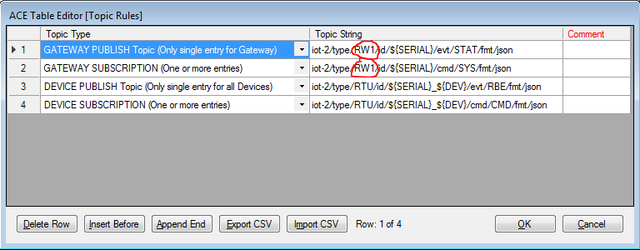
NOTE: use one or the other graphic, not both.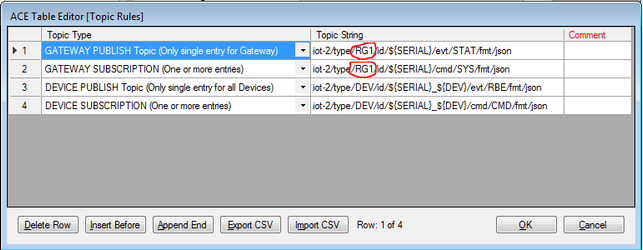
Upload configuration to the RediGate
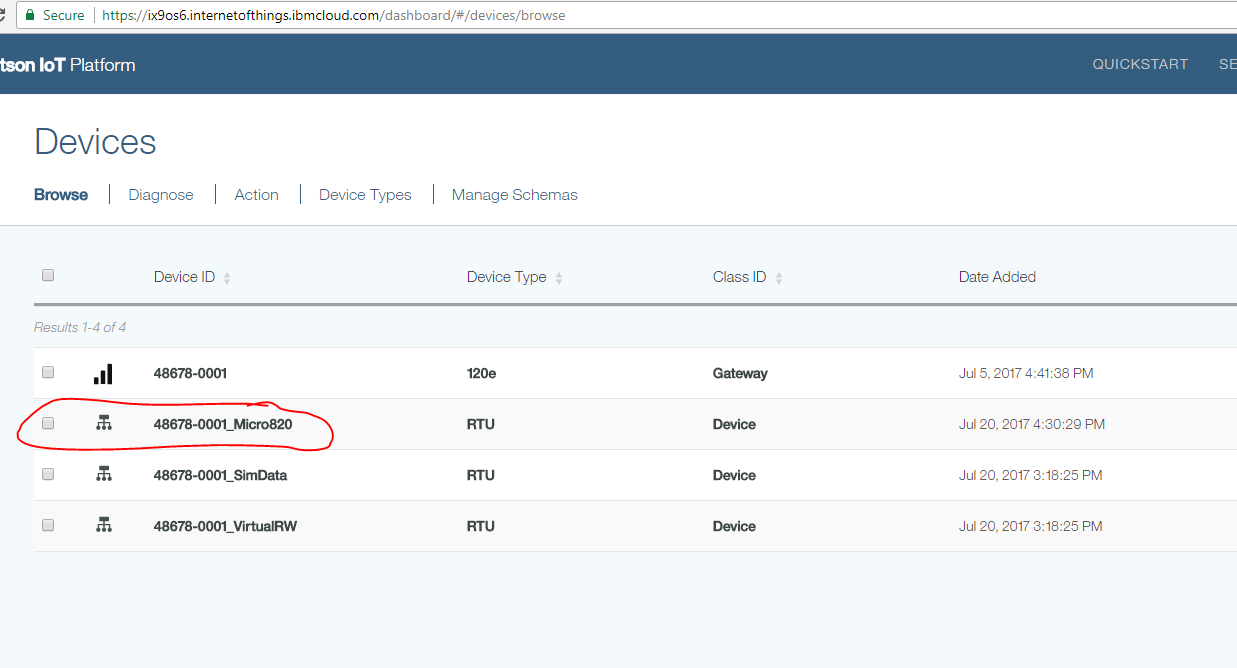
If you kept the topic structure from the demo configurationIn the Devices section of Watson IoT, you should a gateway with a "Device ID" that matches the serial number of your RediGate, and two devices connected to the gateway named "(your serial number)_SimData" and "(your serial number)_VirtualRW":

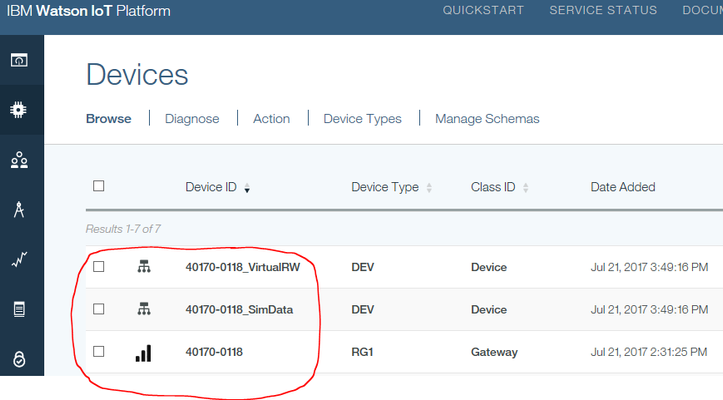
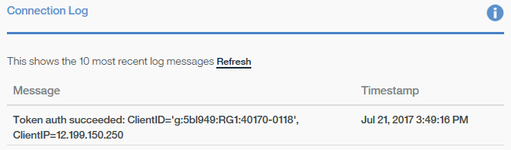
- Click on the Gateway name to see the connection status.
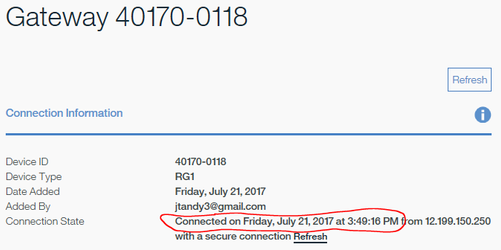
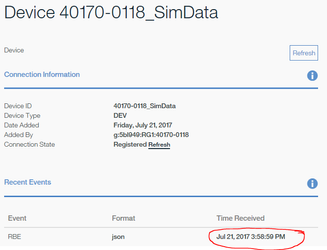
Data should be being sent from the SimData RTU every 30 seconds:

Info title Connection Not Establishing It may take up to 5 minutes after uploading the configuration to the Redigate for the connection to IBM to be established, especially over a cellular connection.
 Password: Authentication Token that was created when you made your device
Example 2: Publishing Modbus RTU Data to Watson IoT
...
- Completion of "Example 1" above
- Completion of the "Field Device Quick Start" corresponding to the field device you are trying to connect to. In this particular example, we will be connecting to an Open Modbus TCP device, but you should be able to connect to any of the field devices on our protocol list.
...
- Confirm that you can ping the Modbus device using its built-in ping utility (See Ping Utility for more info)
- Open the configuration you used in the "Field Device Quick Start" in the same ACE window as your Watson IoT configuration that is producing the simulated data
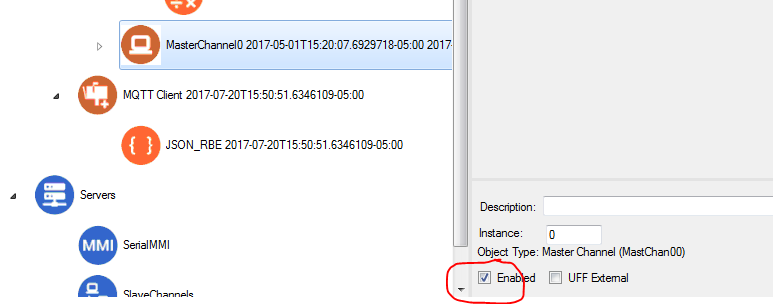
- Copy and paste the "Master Channel" object from the ModbusTCP configuration into your Watson IoT configuration
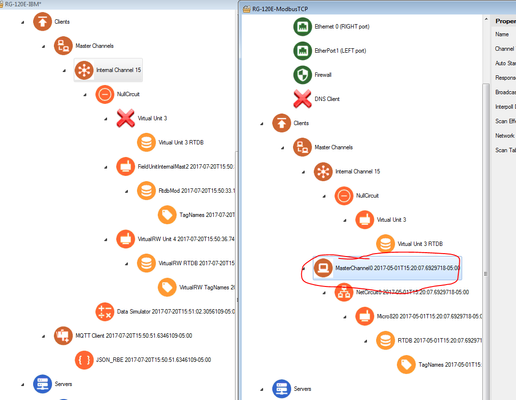
- Note the "Instance" of the MasterChannel0 object – in this example it is '0', which is will what we reference when we add a record to our Watson IoT "Poll Table".
- Note the "Instance" of the MasterChannel0 object – in this example it is '0', which is will what we reference when we add a record to our Watson IoT "Poll Table".
- Save and upload configuration to the RediGate
- If you followed the "Device Publish" topic structure in the "Publishing Simulated Data to Watson IoT" example above, you should see a new device named (your serial number)_(your unit name), which will be publishing data as it changes based on your channel scan rate: