Setting up AWS OpenVPN Server
- Former user (Deleted)
Introduction
These instructions guide you through setting up an OpenVPN Server using Amazon Web Services (AWS).
Set up the server by following the OpenVPN Quick Start tutorial. See the additional instructions below for guidance.
Set the server hostname
Login through the web UI and change the hostname to the domain name of the server. Also update the interface so it allows all connections (if not already set)

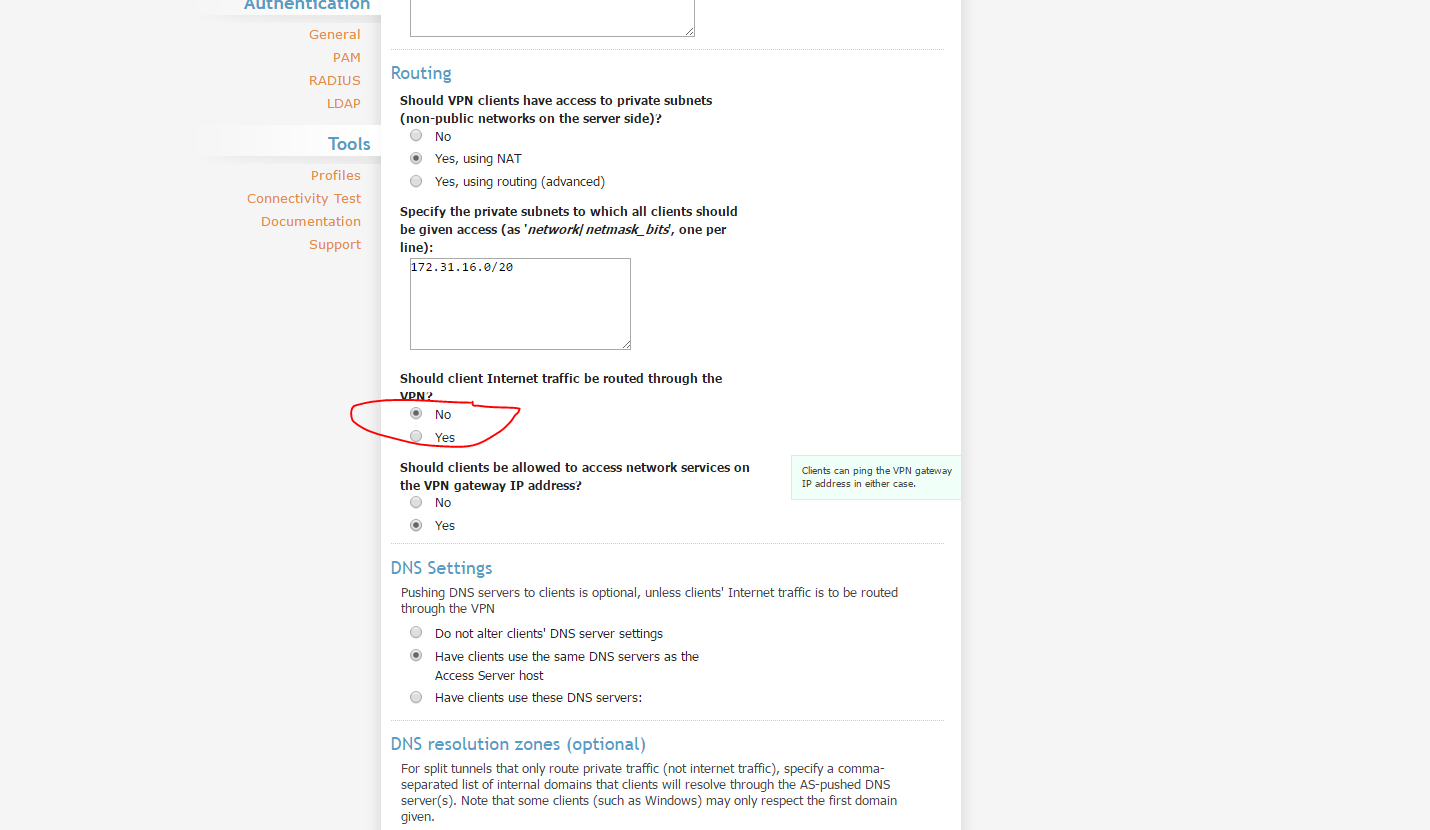
Don't Route Internet Traffic Through VPN
Creating Self-Signed Certificates (https://openvpn.net/index.php/open-source/documentation/howto.html#pki)
Generate the master Certificate Authority (CA) certificate & key
NOTE: MAKE SURE YOU RUN THE COMMAND LINE AS ADMINISTRATOR
In this section we will generate a master CA certificate/key, a server certificate/key, and certificates/keys for 3 separate clients.
For PKI management, we will use easy-rsa, a set of scripts which is bundled with OpenVPN 2.2.x and earlier. If you're using OpenVPN 2.3.x, you need to download easy-rsa separately from here.
If you are using Linux, BSD, or a unix-like OS, open a shell and cd to the easy-rsa subdirectory. If you installed OpenVPN from an RPM or DEB file, the easy-rsa directory can usually be found in /usr/share/doc/packages/openvpn or /usr/share/doc/openvpn (it's best to copy this directory to another location such as /etc/openvpn, before any edits, so that future OpenVPN package upgrades won't overwrite your modifications). If you installed from a .tar.gz file, the easy-rsa directory will be in the top level directory of the expanded source tree.
If you are using Windows, open up a Command Prompt window and cd to \Program Files\OpenVPN\easy-rsa. Run the following batch file to copy configuration files into place (this will overwrite any preexisting vars.bat and openssl.cnf files):
init-config
Now edit the vars file (called vars.bat on Windows) and set the KEY_COUNTRY, KEY_PROVINCE, KEY_CITY, KEY_ORG, and KEY_EMAIL parameters. Don't leave any of these parameters blank.
Next, initialize the PKI. On Linux/BSD/Unix:
. ./vars ./clean-all ./build-ca
On Windows:
vars clean-all build-ca
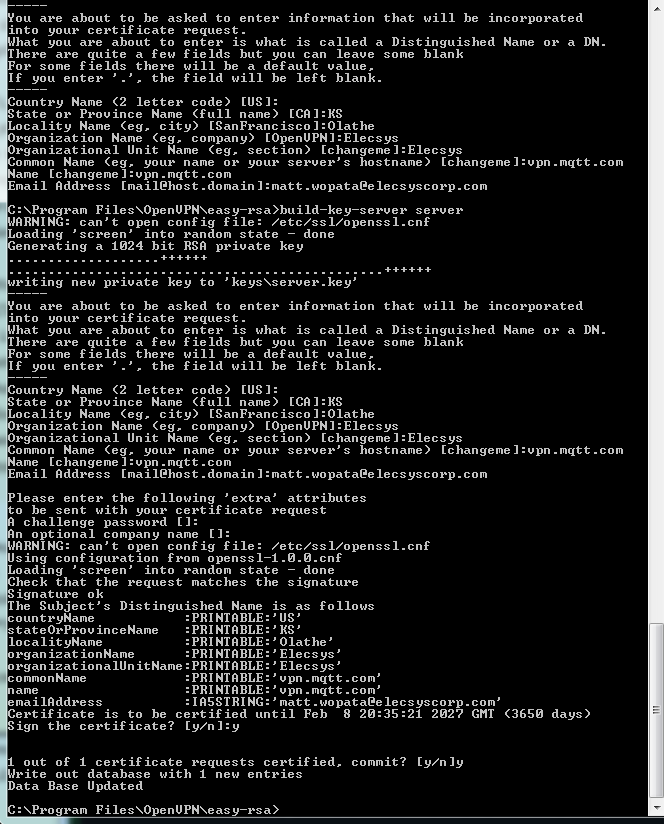
The final command (build-ca) will build the certificate authority (CA) certificate and key by invoking the interactive openssl command:
ai:easy-rsa # ./build-ca Generating a 1024 bit RSA private key ............++++++ ...........++++++ writing new private key to 'ca.key' ----- You are about to be asked to enter information that will be incorporated into your certificate request. What you are about to enter is what is called a Distinguished Name or a DN. There are quite a few fields but you can leave some blank For some fields there will be a default value, If you enter '.', the field will be left blank. ----- Country Name (2 letter code) [KG]: State or Province Name (full name) [NA]: Locality Name (eg, city) [BISHKEK]: Organization Name (eg, company) [OpenVPN-TEST]: Organizational Unit Name (eg, section) []: Common Name (eg, your name or your server's hostname) []:OpenVPN-CA Email Address [me@myhost.mydomain]:
Note that in the above sequence, most queried parameters were defaulted to the values set in the vars or vars.bat files. The only parameter which must be explicitly entered is the Common Name. In the example above, I used "OpenVPN-CA". Generate certificate & key for serverNext, we will generate a certificate and private key for the server. On Linux/BSD/Unix: ./build-key-server server On Windows: build-key-server server |
For "server", make sure you put the IP address of the server as indicated by the default certificate:
CA files will be found here: C:\Program Files\OpenVPN\easy-rsa\keys
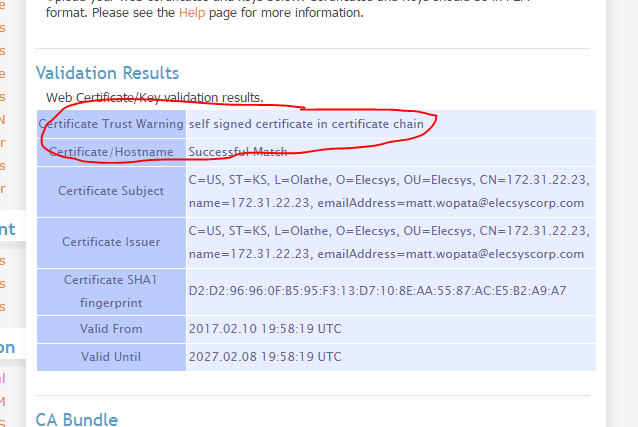
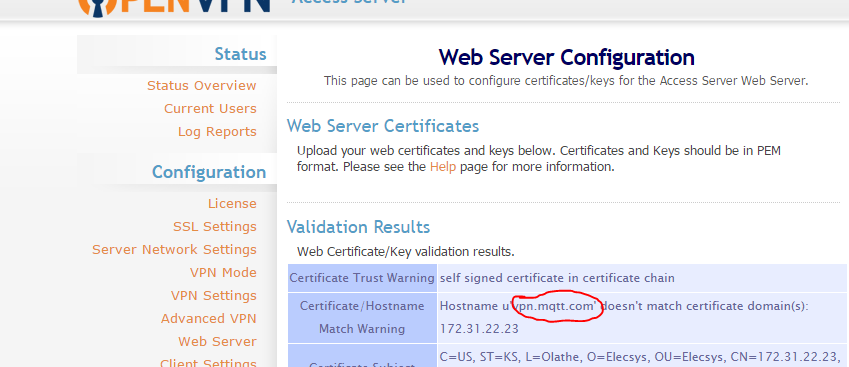
Upload them to the certificates section on the server
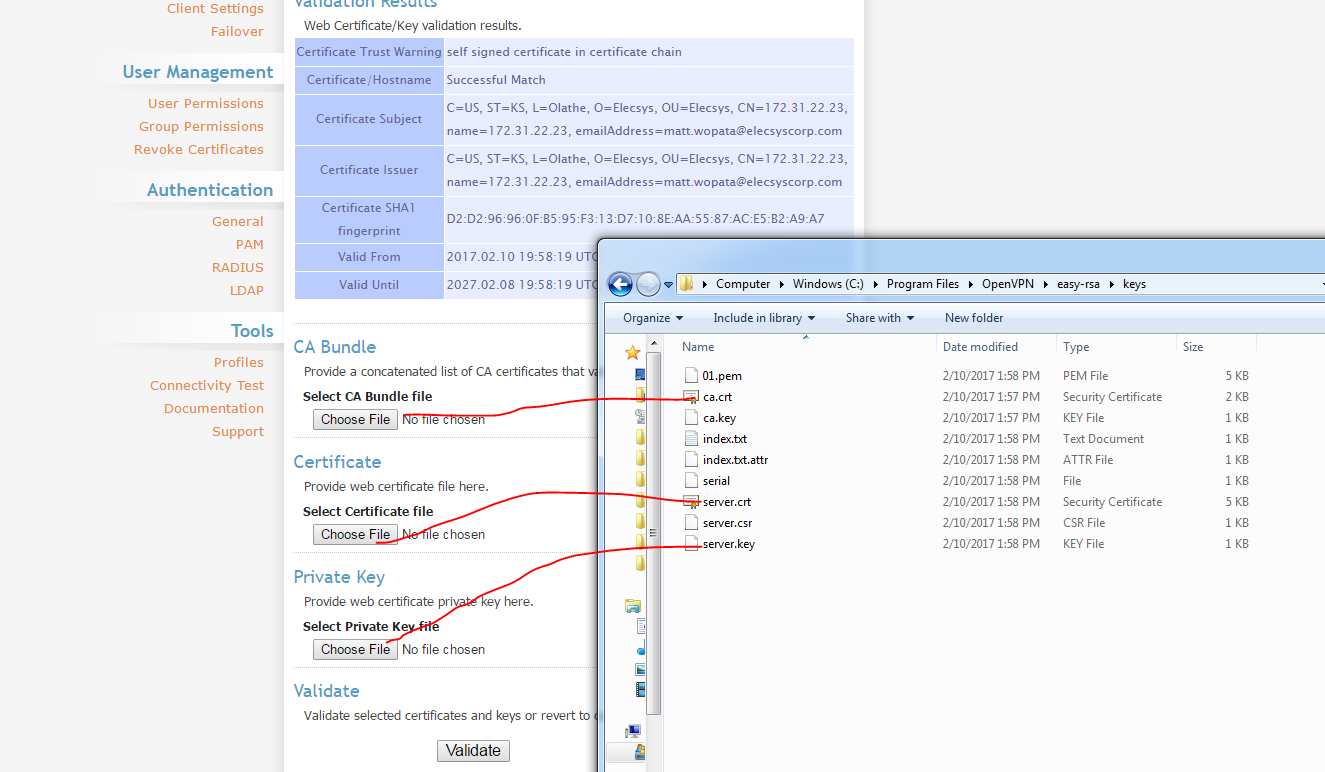
View Successful Match