/
Modbus TCP Slave Configuration
Modbus TCP Slave Configuration
- Former user (Deleted)
Owned by Former user (Deleted)
Introduction
The RediGate can convert over 60+ field devices into Modbus (TCP or serial) or DNP slave devices. This tutorial shows how to setup your RediGate to act as a Modbus TCP slave that can be polled by a Modbus TCP master such as a PLC, SCADA system, or OPC server. This tutorial uses a RediGate 120e to demonstrate this functionality, but it applies to any RediGate device that can be polled as a Modbus slave on a TCP network.
Pre-Requisites
- A RediGate 100 or 400 series device with network connectivity
- Completion of the Getting Started Guide for your respective RediGate device (See RediGate 100 Series Getting Started Guide or RediGate 400 Series Getting Started Guide)
- Ability to ping the Modbus master device (PLC, SCADA, OPC, etc.) from the RediGate (see Ping Utility for information regarding how to ping network devices from the RediGate)
Instructions
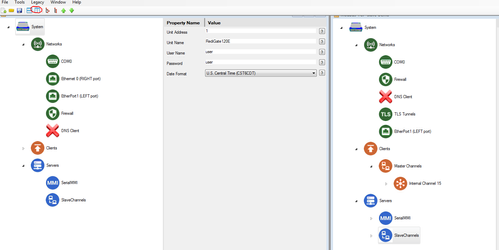
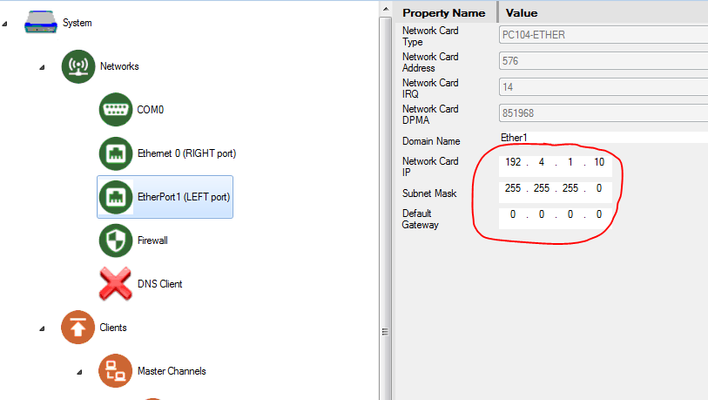
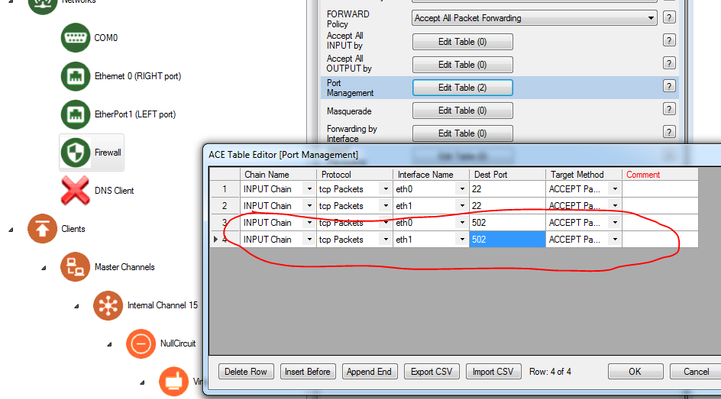
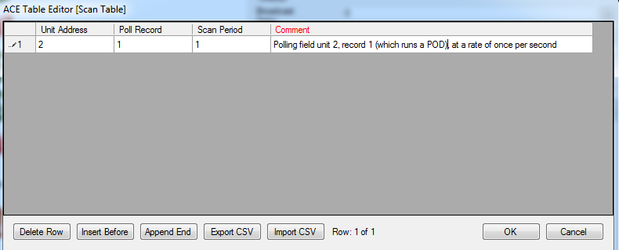
- Using ACE, Open the default config you used in the "Getting Started Guide"
Download and open Modbus-TCP-Slave-Demo.xml from the http://redigate.elecsyscorp.com/examples site within the same ACE window
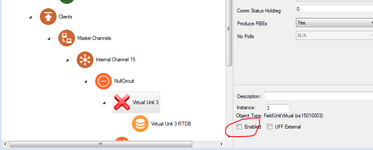
- Disable Virtual Unit 3 by clearing its Enabled checkbox.
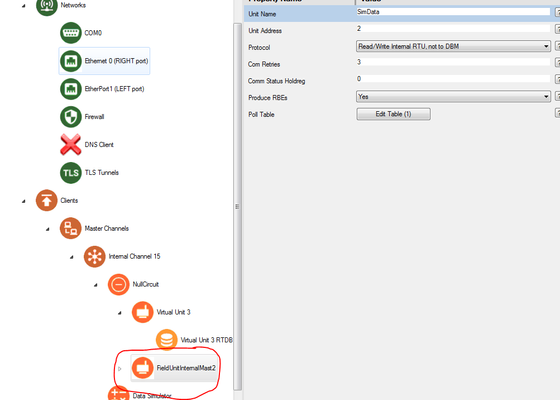
- FieldUnitInternalMast2 (paste under NullCircuit)
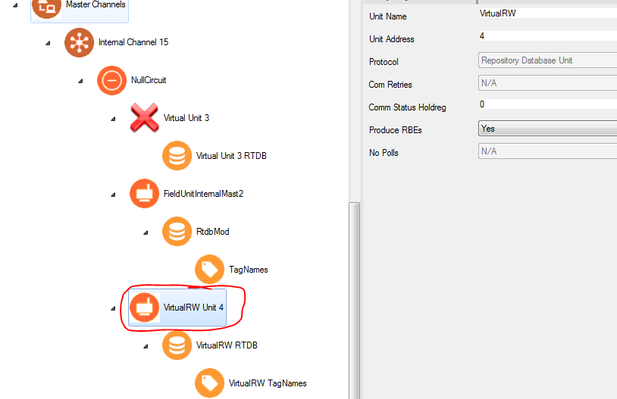
- VirtualRW Unit 4 (paste under NullCircuit)
- Data Simulator (paste under Internal Channel 15)
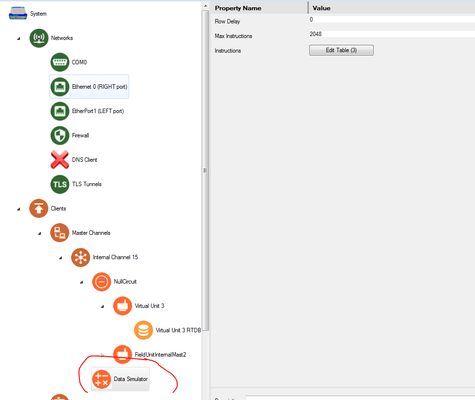
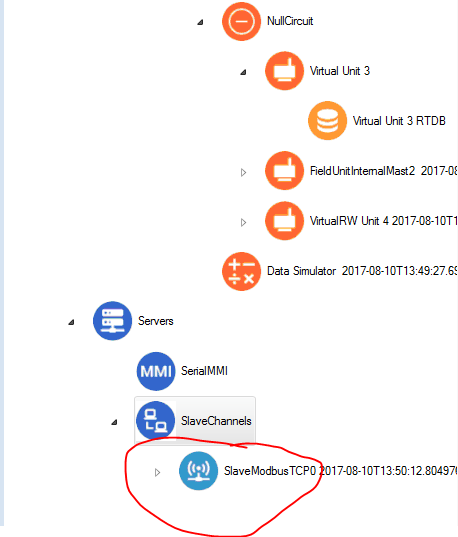
- FieldUnitInternalMast2 (paste under NullCircuit)
, multiple selections available,
Related content
Open Modbus TCP to RediGate Master
Open Modbus TCP to RediGate Master
More like this
Modbus RTU Slave (Serial) to RediGate Master
Modbus RTU Slave (Serial) to RediGate Master
More like this
Protocol_Modbus-Master
Protocol_Modbus-Master
More like this
Example Configurations
Example Configurations
More like this
RediGate P2P Configuration Guide - Point to Point using MQTT
RediGate P2P Configuration Guide - Point to Point using MQTT
More like this
HART to RediGate Master
HART to RediGate Master
More like this