RediGate to Generic MQTT
- Jon Tandy
- Jon Tandy (Deactivated)
Introduction
In this tutorial, we will be demonstrating connectivity to a generic MQTT server using JSON publisher. We will use a RediGate 120e to demonstrate, but this tutorial can be applied to any RediGate device with Internet connectivity.
NOTE: If you are using an IoT platform such as IBM, Azure, AWS, etc., see instead our specific example configurations for those platforms at: IIoT Platform Quick Starts
Example 1 : Publishing Simulated Data to MQTT Server
Pre-Requisites
- A RediGate 100 or 400 series device with internet connectivity
- Completion of the Getting Started Guide for your respective RediGate device (RediGate 100 Series or RediGate 400 Series)
- MQTT Server, such as mosquitto (https://mosquitto.org), that allows simple publish and subscribe of generic data topics. (Ignition's MQTT Distributor will work for this, but Ignition will not display JSON data without custom programming.)
- Ability to ping the Internet (using DNS, so an address like google.com) from your RediGate, or an MQTT server on your local network.
Instructions
- Using ACE, Open the default configuration you used in the "Getting Started Guide".
- Download and open Elecsys-GenericMQTT-Demo.zip from https://ftp.elecsyscorp.com/RediGate/Examples/Elecsys-GenericMQTT-Demo.zip.
You will need to extract the .xml file from the .zip file you downloaded from the website. By default, ACE stores configuration files in the Documents\Elecsys\ACE\CFG folder, but you can store the configuration in any file location accessible by the ACE program.
You cannot copy/paste nodes unless both configurations are open within the same instance of ACE. You can use the "Tile" buttons to have the windows automatically size themselves within the ACE program:
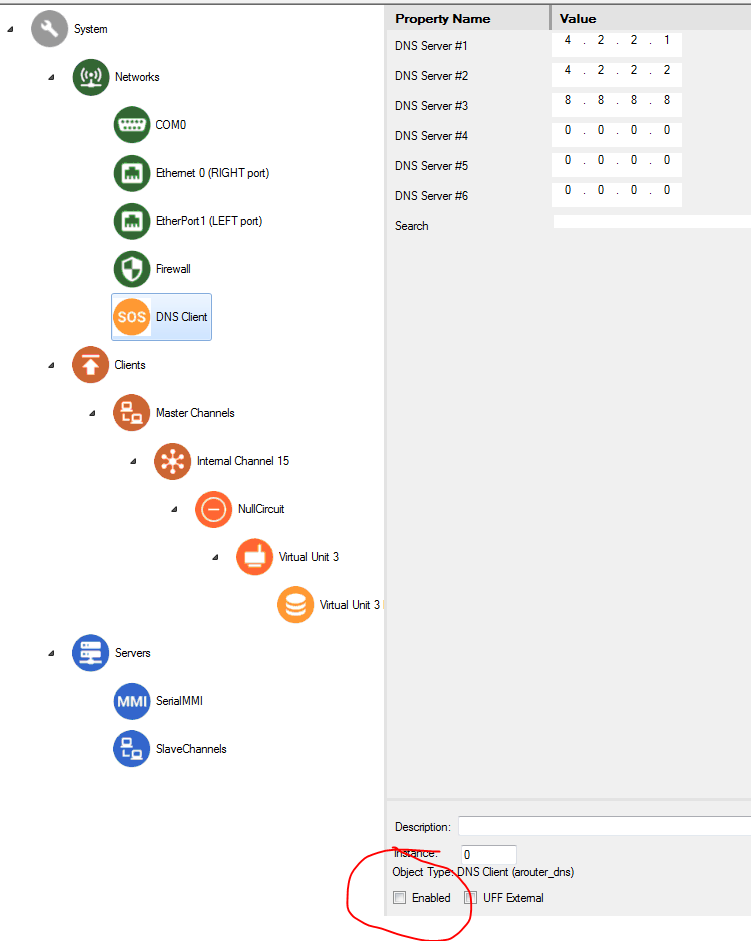
- In your default configuration, enable the DNS Client object by setting its Enabled checkbox.
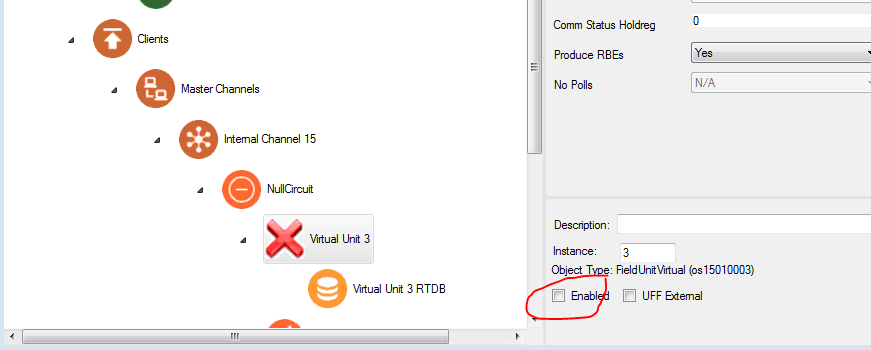
- Disable Virtual Unit 3 by clearing its Enabled checkbox.
- Copy and paste the following objects from the Elecsys-GenericMQTT-Demo.xml config into your default configuration.
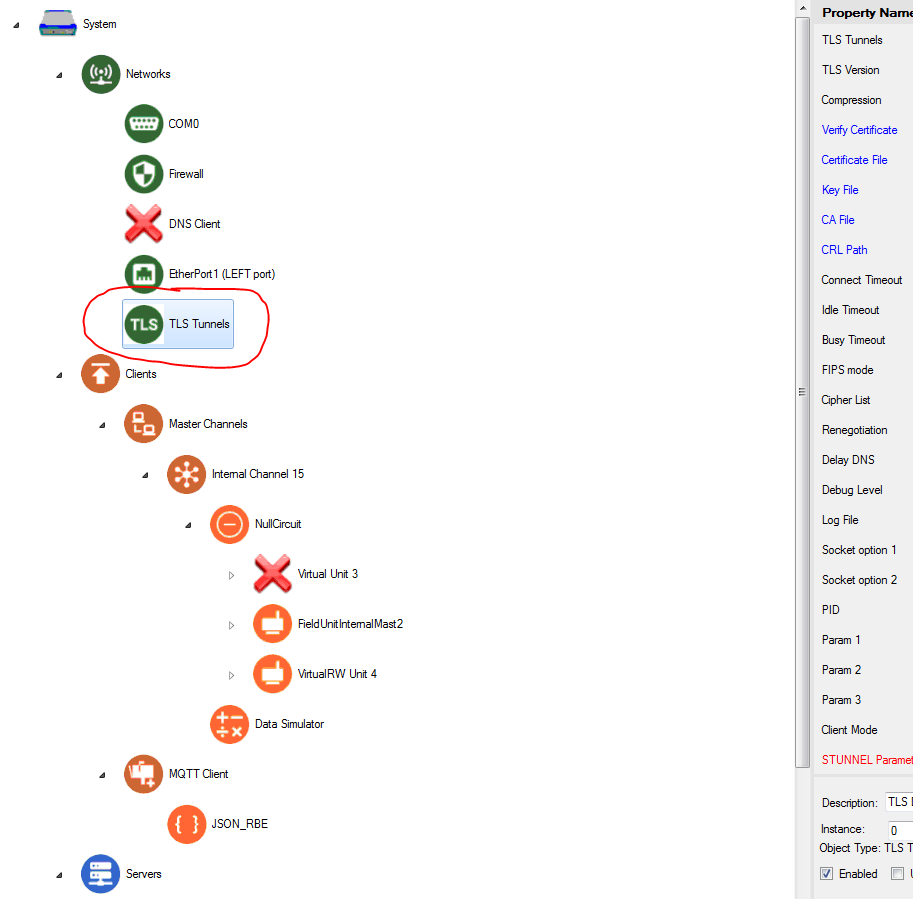
- TLS Tunnels (paste under Networks).
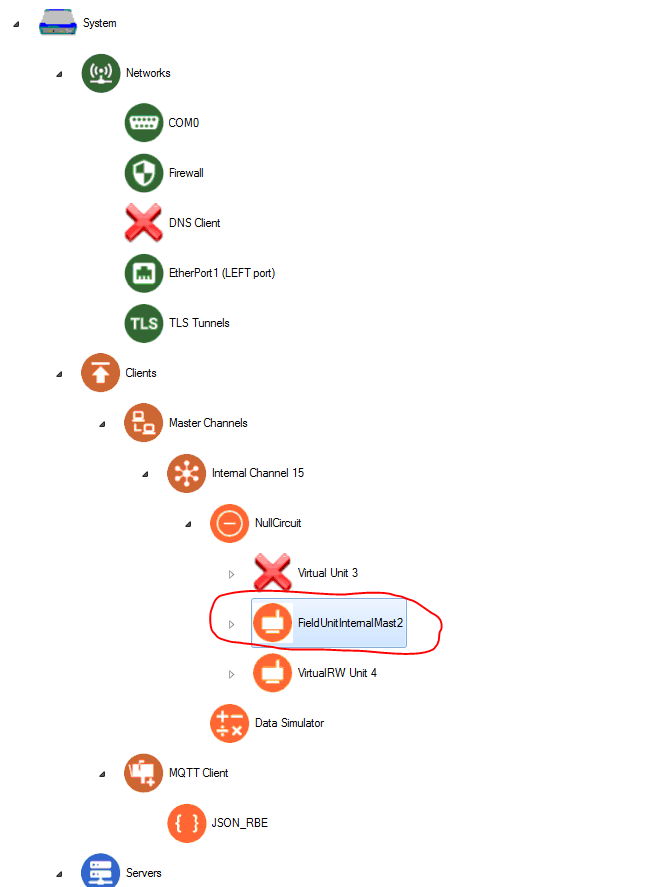
- FieldUnitInternalMast2 (paste under NullCircuit)
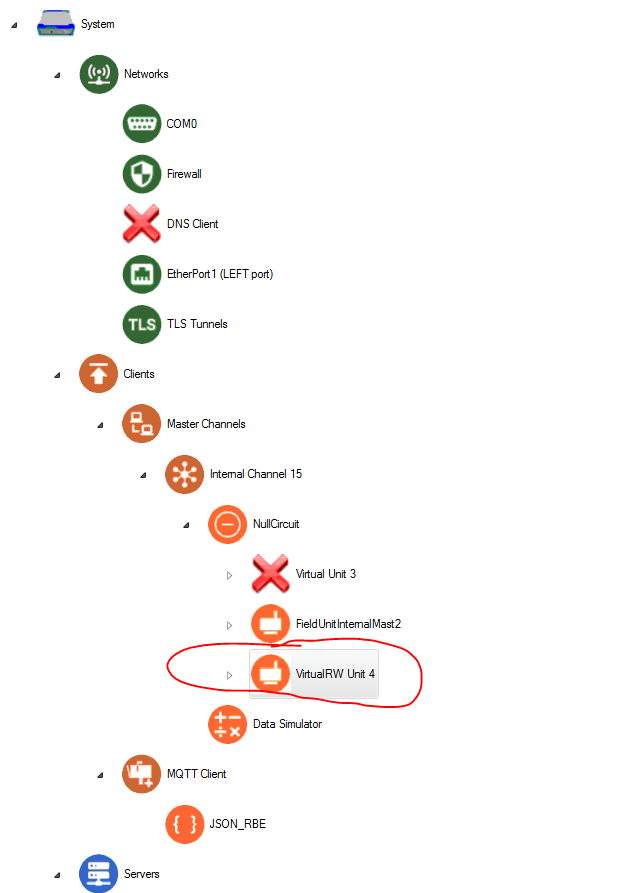
- VirtualRW Unit 4 (paste under NullCircuit)
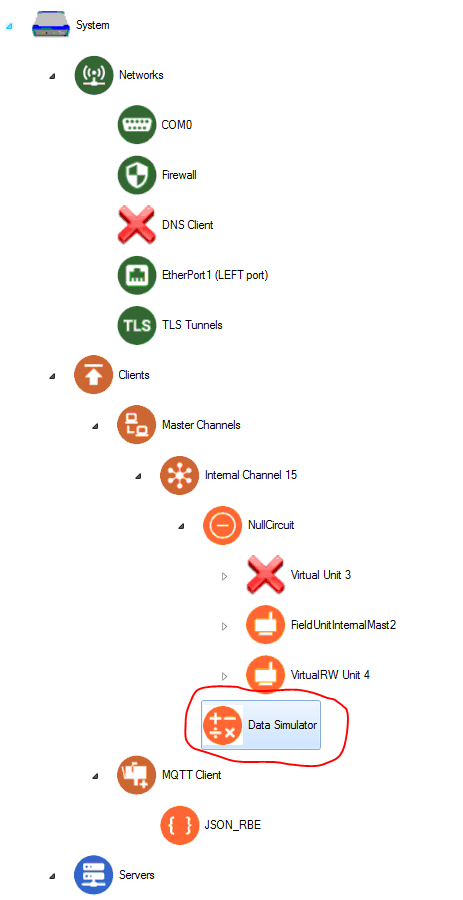
- Data Simulator (paste under Internal Channel 15)
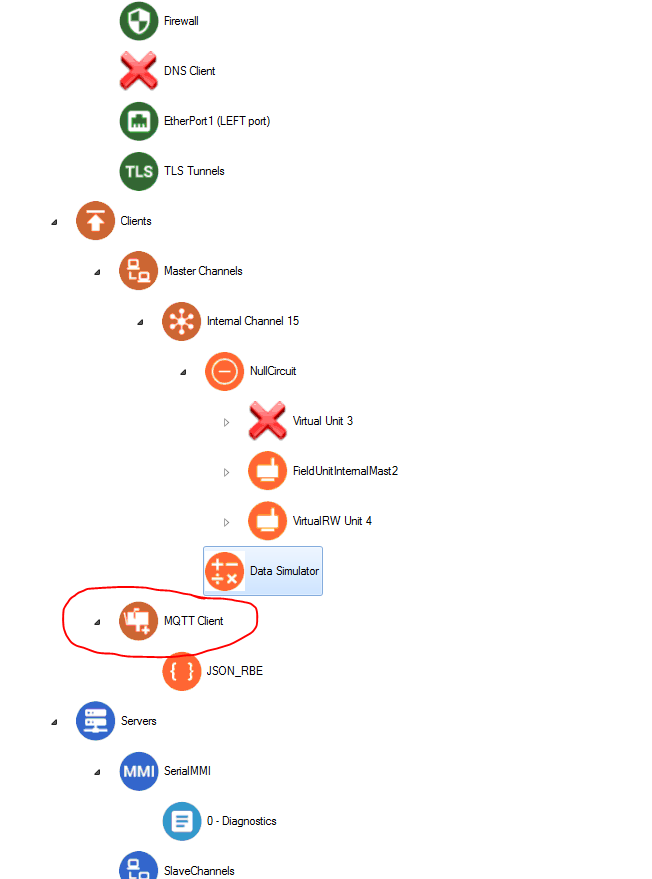
MQTT_Client (paste under Clients)
Renaming Copied Nodes
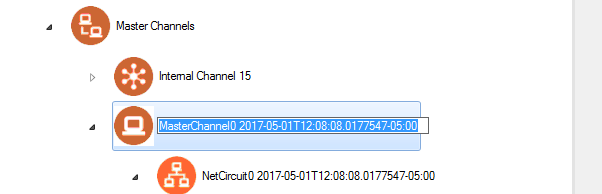
Each node must have a unique name, so ACE automatically appends a timestamp to the name when it is pasted into a configuration. You can rename the nodes by clicking on the name of the node or by right-clicking on the node and selecting the "Rename Node" option (ACE 3.5 or later). The name has no operational significance and is user-definable – just make sure that the name remains unique in this configuration.
- TLS Tunnels (paste under Networks).
Copy Table data from the Elecsys-GenericMQTT-Demo.xml Internal Channel 15 → Scan Table into your RediGate Configuration (in Internal Channel, open Scan Table, right-click and select Paste, over-write data).
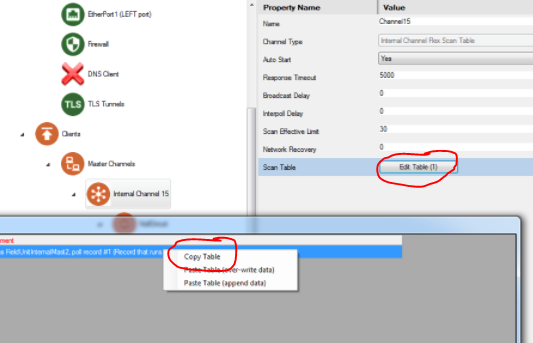
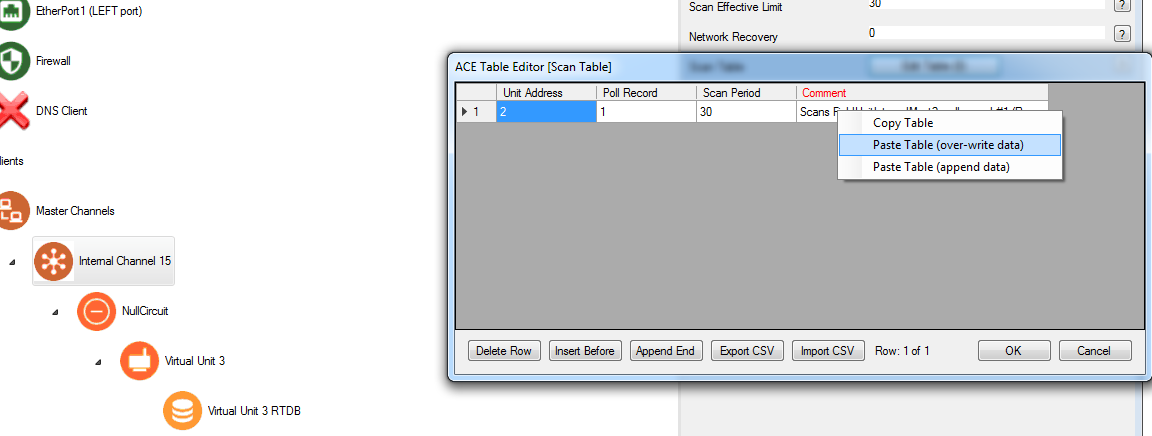
Scan Table Info
The "Scan Period" object tells the RediGate which RTU (Unit 2, labeled as FieldUnitInternalMast2) to run at an interval (Scan Period) which is set to every 30 seconds. This is how frequently the data will be published to MQTT.
Warning: Data charges may result from excessive usage of MQTT publishing and/or cellular data plan, depending on your network setup.
- Update your MQClient properties to match the parameters of your MQTT server. This will depend on your server settings. For instance:
a. Set the Client ID, if your server has requirements for it. This must be a unique identifier on the MQTT server. You can leave it blank to use a random identifier, or use${GATEWAY}for the RediGate name, or${SERIAL}for the RediGate serial number.
b. Set the URL_List table with the IP address or URL name of your server. If you are using TLS to connect to the server, set this address to: 127.0.0.1
c. Set the Connection Port with the TCP port of your server. Typically this will be 1883 for unsecure connections, or 8883 for TLS connections.
d. If your server uses username/password authentication, enter the User Name and Password.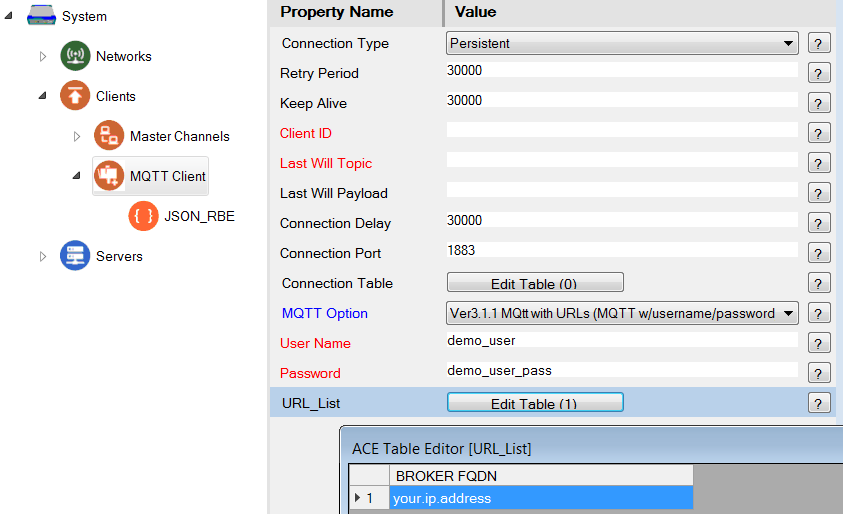
- If you are using TLS authentication, you need to:
a. Set the MQTT Client broker address (above, in URL_List table) to 127.0.0.1
b. Set the MQTT Client Connection Port to 8883.
c. In the TLS Tunnels configuration, make the following settings:
Update the STUNNEL Parameters to point to your server name.
For instance, the Connect To address should be similar to: your.mqtt-server.com:8883 OR 10.20.30.40:8883
Edit the MQTT Client → JSON_RBE → Topic Rules table, so that the table entries comply with the device publish topics that you expect to receive from the RediGate.
The following is given as an example in this configuration:
(the "${GATEWAY}" is a variable that will substitute the RediGate Unit Name, and "${DEV}" will substitute the FieldUnit device name in the MQTT topics)GATEWAY PUBLISH topic: RBE/Test/${GATEWAY}DEVICE PUBLISH topic:RBE/Test/${GATEWAY}/${DEV}GATEWAY SUBSCRIPTION topic:DEVICE SUBSCRIPTION topic: CMD/Test/${GATEWAY}/${DEV}CMD/Test/${GATEWAY}
Upload configuration to the RediGate.
Upon connection to the MQTT server, there should be a gateway message published on the GATEWAY PUBLISH topic string. Data should be being sent from the SimData RTU every 30 seconds, using the DEVICE PUBLISH topic string.
Example 2 (TBD): Sending Data from MQTT to Field Device
Once your device is successfully publishing data to MQTT, the next step is to subscribe to commands sent from MQTT to the field devices connected to the RediGate. Details on the JSON structure that the RediGate expects to receive can be found in the JSON-RBE MQTT Payload Format document. The steps below outline how to write data to an integer tag under a virtual field unit:
TBD: This section has not been completed yet.
Pre-Requisites
- Completion of "Example 1" above.