RediGate to Inductive Automation Ignition--MQ-RBE
- Jon Tandy
- Former user (Deleted)
- Former user (Deleted)
New Example Using Sparkplug B Payload
Prior to September 2017, this example used the proprietary Elecsys "MQ-RBE" payload for publishing data to Ignition. While the MQ-RBE payload is still supported, it is recommended that new users utilize the Cirrus-Link "Sparkplug B" payload, which is open source and contains more features (such as historical "store-and-forward" functionality). See RediGate to Inductive Automation Ignition--Sparkplug B example to demonstrate the Sparkplug B payload format.
Introduction
In this tutorial, we will be demonstrating connectivity to the Ignition platform (www.inductiveautomation.com) using the MQTT modules available from Cirrus Link (http://www.cirrus-link.com/). Elecsys has a publicly hosted Ignition server that our customers can use for testing connections to their RediGate and RediLink devices. We will use a RediGate 120e with internet connectivity to demonstrate this connectivity, but this tutorial can be applied to any RediGate device with internet connectivity. To setup your own MQTT-enabled Ignition server to publish data to, visit https://docs.chariot.io/display/CLD/MQTT+Module+Installation.
Pre-Requisites
- A RediGate 100 or 400 series device with internet connectivity
- Completion of the Getting Started Guide for your respective RediGate device (See RediGate 100 Series Getting Started Guide or RediGate 400 Series Getting Started Guide)
- Ability to ping ignition.mqtt.com from your RediGate device (see Ping Utility for information regarding how to ping devices/websites from the RediGate)
- If you are unable to ping ignition.mqtt.com, you may need to enable DNS on your device:
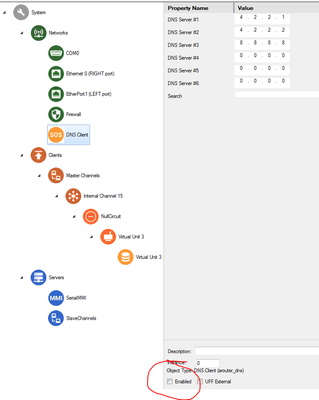
- If you are unable to ping ignition.mqtt.com, you may need to enable DNS on your device:
Instructions
- Using ACE, Open the default config you used in the "Getting Started Guide"
Download and open the Elecsys-Ignition-Demo.zip file from https://ftp.elecsyscorp.com/RediGate/Examples/Elecsys-Ignition-Demo.zip.
You will need to extract the .xml file from the .zip file you downloaded from the website. By default, ACE stores configuration files in the Documents\Elecsys\ACE\CFG folder, but you can store the configuration in any file location accessible by the ACE program.
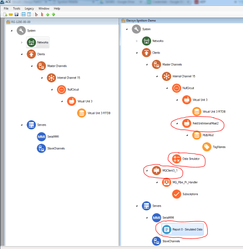
You cannot copy/paste nodes unless both configurations are open within the same instance of ACE. You can use the "Tile" buttons to have the windows automatically size themselves within the ACE program:
 You will need to extract the .xml file from the .zip file you downloaded from the website. By default, ACE stores configuration files in the Documents\Elecsys\ACE\CFG folder, but you can store the configuration in any file location accessible by the ACE program.
- Copy and paste the following objects from the Elecsys-Ignition-Demo config into the configuration you created in the "Getting Started" guide:
- FieldUnitInternalMast2
- Data Simulator
- MQClient3_1
- Report 0 - Simulated Data
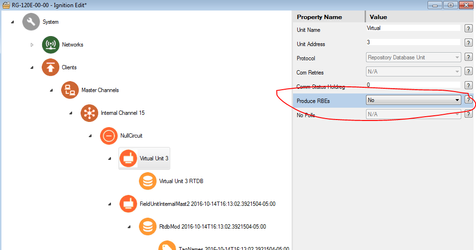
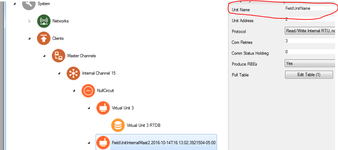
- Under the "Virtual Unit 3" object, change the "Produce RBEs" value to "No"
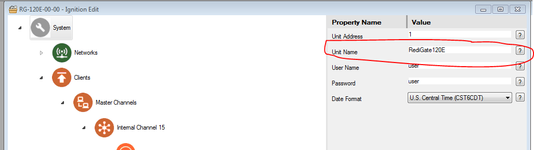
- Change the following names to something unique to your device:
- System → Unit Name
- FieldUnitInternalMast2 → Unit Name
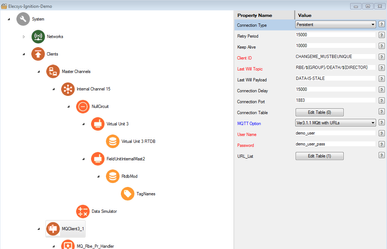
- MQClient3_1 → Client ID
- System → Unit Name
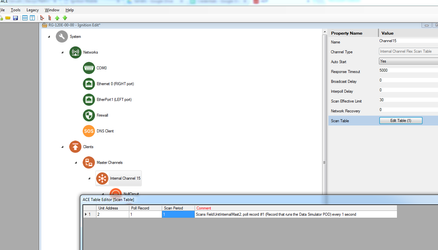
- Update the "Internal Channel 15" object's scan table so that it scans the poll table in the FieldUnitInternalMast2 object we added:
- Save your configuration with a different name than your default config
- Upload the configuration to your device
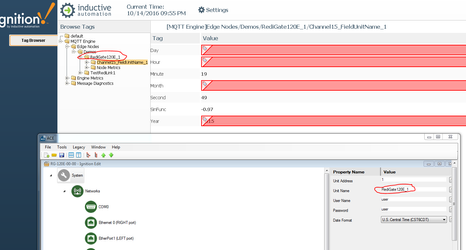
- Visit http://ignition.mqtt.com and launch the "Public MQTT Tags" application
- Username: demo_user
- Password: demo_user_pass
- You should be able to view the tags that correspond with your System → Unit Name
- If you have your own Ignition + Cirrus-Link Modules server you would like to publish the data to, simply edit the "MQClient3_1" object so that it has the correct server credentials":
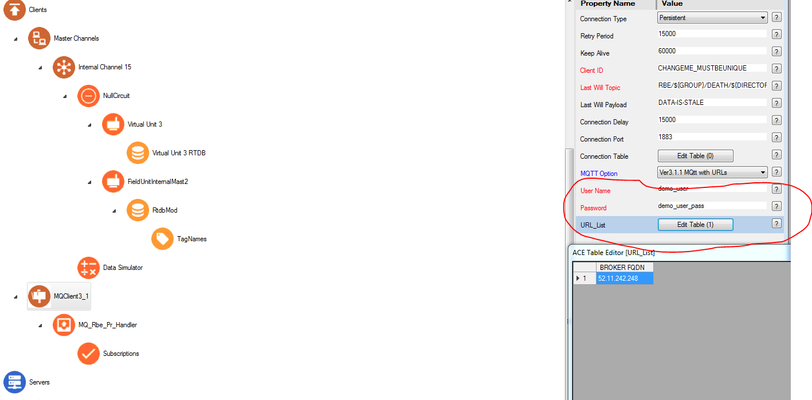
- To setup a TLS connection using port 8883 instead of the basic 1883 port, see TLS Connection to MQTT Broker