Setting up PuTTY for Serial Communication
- Former user (Deleted)
To set up PuTTY for serial communication, run the PuTTY program and configure it to use the appropriate serial port on your configuration PC. In the image below, Windows has assigned the serial driver COM5 :
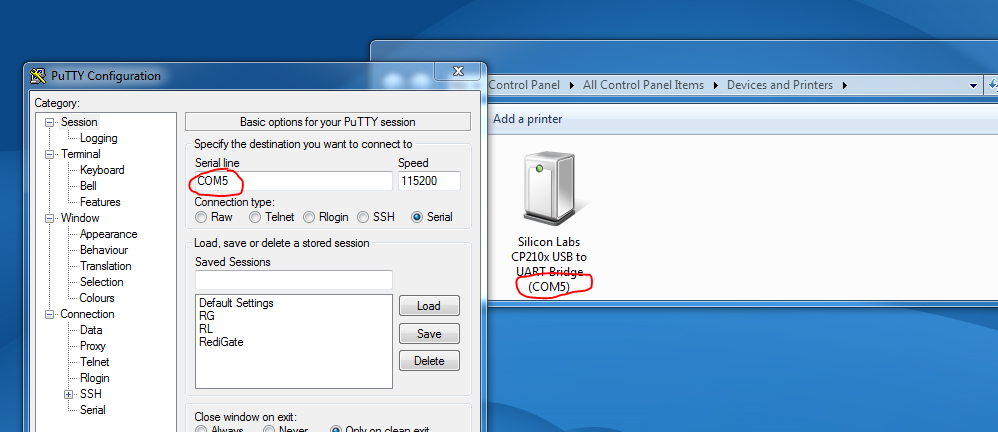
The settings below are the default settings for the COM0 serial connection on the RediGate 400:

Update Flow Control Setting - May Freeze Putty Menu
You will need to update the Serial → Flow Control setting from its default value of "XON/XOFF" to "None". Failure to do so may result in Putty freezing after boot-up.
You can enter a "Saved Sessions" name and click the Save button to save this session for future use, if you desire. Click the Open button to begin communication. Power on the RediGate, and you should see initial startup messages come into the terminal window.