/
Using the L5K Import Tool
Using the L5K Import Tool
- Jon Tandy
- Former user (Deleted)
Owned by Jon Tandy
Below are brief instructions describing the use of the ACE Configuration Management Utility for setting up RediGate configurations to poll EtherNet/IP devices. The ACM Utility includes an L5X Import feature, which is described in more detail here: Elecsys ACE Management Utility
- Download, extract, and install the "ACE Configuration Management Utility" software from the Software page.
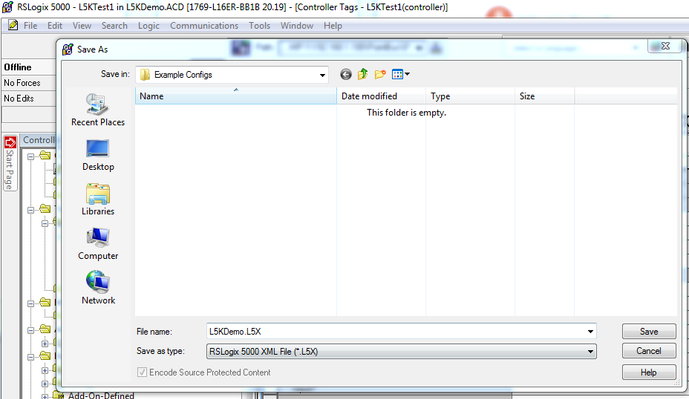
- From the Rockwell software, save the .ACD or .L5K file of the controller you are working on as a .L5X file:
- Set up an ACE configuration file with Master Channel, NetCircuit, FieldUnitEthernetIP, RTDB, and TagNames object. The tables in these objects (excluding NetCircuit) will be configured using the ACM Utility. All other properties will need to be configured in the ACE Editor.
- In the ACM Utility, click the Main Menu button. Choose a location with your ACE XML configuration(s) and set the output path, then click List Configurations.
- Click the L5X Import button to set the following properties:
ACE XML Configuration - choose the configuration file to modify.Choose the Master Channel and EtherNet/IP Field Unit to configure.Choose the L5X program file.Unless you are reconfiguring an existing configuration, clear the L5X Tag Setup File to set up a default filename.Then click the OK button to read tags from the L5X PLC program.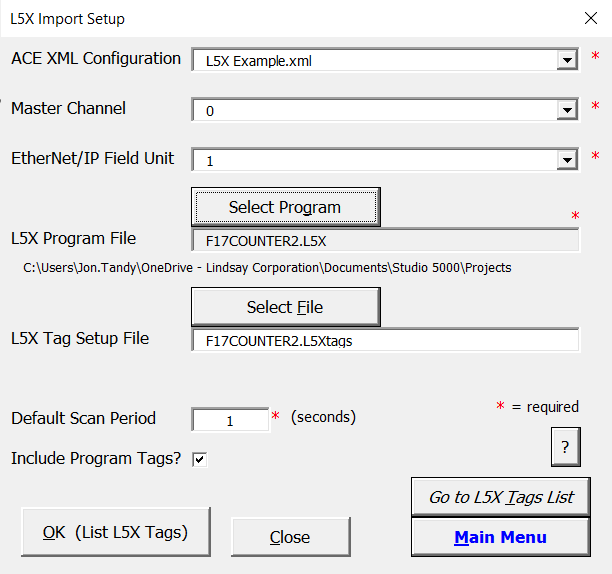
- On the L5X Tags sheet, select which tags you would like to have the RediGate poll by entering a "1" in Column A (Include) next to each tag or array or AOI/UDT structure. Clear the "1" for any tags you don't want to poll.
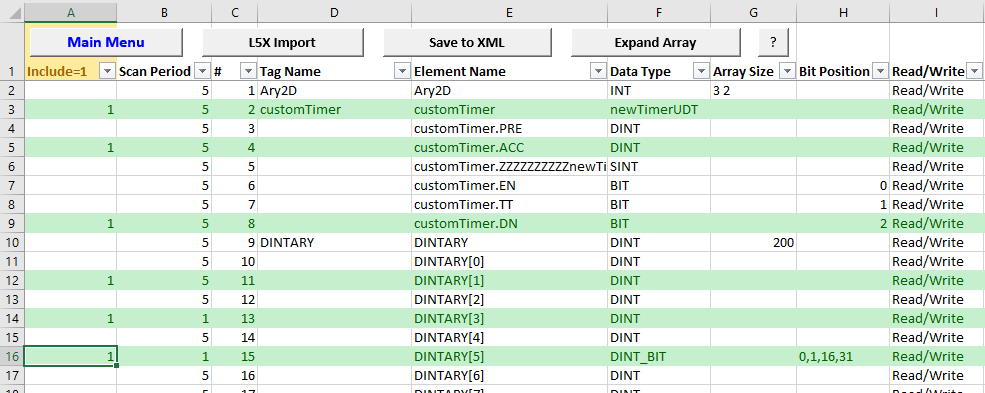
- Click the “Save to XML” button to save the tag information into the ACE XML configuration. Switch back to the ACE Editor and re-open the modified configuration to continue editing or to upload it to the RediGate.
Related content
EtherNet-IP to RediGate Master
EtherNet-IP to RediGate Master
More like this
Protocol_EtherNetIP-Master
Protocol_EtherNetIP-Master
Read with this
Using the L5K Import Tool (old application)
Using the L5K Import Tool (old application)
More like this
DF1 Over Ethernet to RediGate Master
DF1 Over Ethernet to RediGate Master
More like this
BACnet to RediGate Master
BACnet to RediGate Master
More like this
Open Modbus TCP to RediGate Master
Open Modbus TCP to RediGate Master
More like this